Showing posts with label Android ႏွင့္ ျမန္မာ Font. Show all posts

Tuesday, 18 March 2014

Myanmar Font for Galaxy S4 (No Need To Root)

Mr. Win Hlaing | 18.3.14 | Best Blogger Tips

Samsung Galaxy S4 ကုိRooting မလုပ္ပဲ ျမန္မာလုိျမင္ရၿပီးအသံုးျပဳႏူိင္ေအာင္လုပ္နည္းေလးပါ။တခုေတာ့ရွိပါတယ္ခင္ဗ်။Facebook Wall,Timeline and Notification ,Tango and Viber စတာ ေတြမွာျမင္ရႏူိင္ၿပီးေတာ့ Browser ေတြမွာေတာ့  ျမန္မာလုိမျမင္ရေသးပါဘူးခင္ဗ်။
website ​ေတြမွာပါ ျမန္​မာစာအမွန္​ျမင္​ရခ်င္​ရင္​
​ေတာ့ mandalay browser apk ကိုအသံုးျပဳ
ႏိုင္​ပါတယ္​။
Mandalay Browser apk v1.2 ေဒါင္းရန္


အဆင့္ (၁) Zawgyi-One Flipfont ကို install လုပ္လိုက္ပါ.


အဆင့္ (၂) iFont  v3.0.2 ကို install လုပ္လိုက္ပါ.


အဆင့္ (၃) Frozen Keyboard Pro v0.5.3 ကိုလဲ install လုပ္လိုက္ပါ.

Keyboard မ်ား အဆင္မေျပဘူးဆိုေတာ့/ ေနာက္ ျမန္မာ Font အဆင့္မေျပရင္ ဒီေနရာ ကိုၾကည့္လိုက္ပါ
  အားလံုးကုိသြင္းၿပီးသြားၿပီဆုိရင္ေတာ့ ေနာက္တဆင့္စပါမယ္။
For S4-i9505
============
Setting> My device > display> font style မွာ ေအာက္ဆံုးက samsung sans ဆိုတာကိုႏွိပ္ေပးပါ ။
S4- i 9505 မွာအေပၚကျမန္မာေဖာင့္Flipfont ထဲမွာပါဝင္တဲ့-(Myanmar+ xxxx?) Font style ၈မ်ဳိးကုိinstall လုပ္မရပါဘူးး..
ၿပီးရင္ေနာက္တစ္ဆင့္သြားပါမယ္။
Setting–>>My device–>> Language and input–>>Frozen keyboard Pro ကုိအမွန္ျခစ္ေပးလုိက္ၿပီး Default keyboard—>>Frozen Keyboard Pro  ကုိေရြးေပးထားပါ။
ၿပီးရင္ေနာက္တစ္ဆင့္သြားပါမယ္။
Ifont  ကိုဖြင့္ပါ အေပၚအတန္းမွာ install ဆိုတာရွိပါတယ္ နွိပ္လိုက္ပါ။
မိမိႀကိဳက္ႏွစ္သက္ရာ-Myanmar font Style,E.g-(Myanmar+iphone) ကိုေရြးပါ။
Install လုပ္လိုက္ပါ set ဆိုတာကိုဆက္ႏွိပ္ပါ
Ok ထပ္ႏွိပ္လိုက္ပီး restart လုပ္ခိုင္းရင္ power ကိုခဏဖိလိုက္ပါ အထဲက Restart ဆိုတာေလးကိုေရြးေပးလိုက္ပါ
power ျပန္တက္လာတဲ့အခါ facebook , Tango and Viber စာ႐ိုက္ၾကည့္လိုက္ပါ ျမန္မာလိုျမင္ရပါၿပီခင္ဗ်ား။
==============================================================
For S4-i9500
=============
Setting> My device > display> font style မွာ Flipfont ထဲမွာပါဝင္တဲ့ (Myanmar+ xxx?) ၈ မ်ဳိးထဲကမိမိႀကိဳက္ႏွစ္သက္ရာ
Font Style ကုိေရြးေပးလုိက္ပါ။
ၿပီးရင္ေနာက္တစ္ဆင့္သြားပါမယ္။
Setting–>>My device–>> Language and input–>>Frozen keyboard Pro ကုိအမွန္ျခစ္ေပးလုိက္ၿပီး Default keyboard—>>Frozen Keyboard Pro  ကုိေရြးေပးထားပါ။
ၿပီးရင္ေနာက္တစ္ဆင့္သြားပါမယ္။
Ifont ကိုဖြင့္ပါ အေပၚအတန္းမွာ install ဆိုတာရွိပါတယ္ နွိပ္လိုက္ပါ။
မိမိႀကိဳက္ႏွစ္သက္ရာ-Myanmar font Style, E.g-(Myanmar+iphone) ကိုေရြးပါ။
Install လုပ္လိုက္ပါ set ဆိုတာကိုဆက္ႏွိပ္ပါ
Ok ထပ္ႏွိပ္လိုက္ပီး restart လုပ္ခိုင္းရင္ power ကိုခဏဖိလိုက္ပါ အထဲက Restart ဆိုတာေလးကိုေရြးေပးလိုက္ပါ
power ျပန္တက္လာတဲ့အခါ facebook ,Tango and Viber စာ႐ိုက္ၾကည့္လိုက္ပါျမန္မာလုိျမင္ရပါၿပီခင္ဗ်ား။
အားလံုးပဲအဆင္ေျပႏိုင္ပါေစ

www.winhlaing.org


က်ြန္ေတာ္တင္သမွ်ပိုစ့္ေတြ Facebook ကေနရယူခ်င္တယ္ဆိုရင္  ဒီမွာ like ေပးခဲ့ပါေနာ္
မန္ဘာ၀င္ခဲ့ျခင္းျဖင့္ ပိုစ့္အသစ္တင္တိုင္း မိမိ Gmail ထဲကိုတိုက္ရိုက္ေရာက္ရွိမည္ျဖစ္ပါသည္။

ထို႔ေၾကာင့္မန္ဘာ၀င္ခဲ့ဖို႔ဖိတ္ေခၚပါတယ္။

Huawei G730 ကုိျမန္မာစာသြင္းဖုိ႕ Myanmar Font APK

Mr. Win Hlaing | 18.3.14 | Best Blogger Tips

image
Huawei G730 အတြက္ ျမန္မာေဖာင္႔ကို APK အေနနဲ႔ Mpx မွ ကိုရဲလင္းေအာင္ မွ တီထြင္ေပးထားတာ ျဖစ္ပါတယ္ခင္ဗ်ာ
One Click APK ျဖစ္တဲ႔ အတြက္ သုံးရတာ အရမ္းအဆင္ေျပလြန္းပါတယ္
ဆိုင္သမားမ်ား ေဆာင္ထားသင္႔တဲ႔ Tool ေလးဆိုရင္ မမွားပါဘူး
G730 အတြက္ ျပဳလုပ္ေပးထားတာ ျဖစ္တဲ႔အတြက္ တျခားဖုန္း ေမာ္ဒယ္
မွာ စမ္းလို႔ အဆင္မေျပရင္ တာ၀န္ယူမည္ မဟုတ္ပါ။ ေအာက္က Link မွာရယူနုိင္ပါတယ္။
​ေအာက္​က လင္​့ခ္​ မွာ Apk အား​ေဒါင္​းယူပါ
 Download Here
===
အားလံုးပဲအဆင္ေျပႏိုင္ပါေစ

www.winhlaing.org


က်ြန္ေတာ္တင္သမွ်ပိုစ့္ေတြ Facebook ကေနရယူခ်င္တယ္ဆိုရင္  ဒီမွာ like ေပးခဲ့ပါေနာ္
မန္ဘာ၀င္ခဲ့ျခင္းျဖင့္ ပိုစ့္အသစ္တင္တိုင္း မိမိ Gmail ထဲကိုတိုက္ရိုက္ေရာက္ရွိမည္ျဖစ္ပါသည္။
ထို႔ေၾကာင့္မန္ဘာ၀င္ခဲ့ဖို႔ဖိတ္ေခၚပါတယ္။

Thursday, 13 March 2014

Original Font style မွာ ျမန္မာ font ခ်ိန္းမရေသာ Samsung ဖုန္းမ်ားအတြက္ newzawgyi / zawgyi flip font မ်ား ခ်ိန္းနည္း

Mr. Win Hlaing | 13.3.14 | | Best Blogger Tips

Samsung ဖုန္းေတြမွာ Zawgyi Flip font ေဆာ့၀ဲနဲ႕ ျမန္မာေဖာင့္ေျပာင္းမရျဖစ္ေနသူေတြအတြက္ newzawgyi / zawgyi flip font မ်ား ခ်ိန္းနည္းေလးပါ( root လိုပါသည္)။ ကဲလုပ္နည္းကုိေအာက္မွာဆက္လက္ဖတ္ရႈၾကရေအာင္။
Root လုပ္ထားတဲ့ Samsung ေတြမွာ ျမန္မာေဖာင့္အျပင္အျခား font လွလွေလးေတြခ်ိန္းခ်င္သူေတြအတြက္ ေအာက္က link မွာေပးထားတာကုိ download လုပ္ပါ။
*** File မ်ားအားရယူရန္***

 ifont-64-v3.6.1 ယူရန္

android myanmar font ယူရန္

android  myanmar zawgyione font ယူရန္

ျပီးရင္ ifont ကိုဖြင့္ပါ။ ifont setting ထဲကchange font mode ကိုဝင္ၿပီးsamsung mode (for samsung) ကို ေ႐ြးထားပါ က်န္တာဒီအတိုင္းထားပါ ပီးရင္ ifont အေပၚ ဘားတန္း မွာ online/local/install/custom ထဲက install ကိုေ႐ြးပါ ခ်ိန္းခ်င္ေသာ font ကို ေ႐ြးပီး ေအာက္နားက set ကို နွိပ္ super user ကစကားမ်ားလာရင္ allow လုပ္ေပးလိုက္ပါ ပီးရင္ ok လုပ္ေပးလိုက္ power offသြားပါလိမ့္မည္ power မက်ရင္လဲ ခ်ေပးလိုက္ပါ ။။ newzawgyi ရယ္ zawgyi flip font ရယ္ ifont ရယ္ အပၚကlink ထဲမွာထဲ့ထားပါတယ္။
 အားလံုးပဲအဆင္ေျပႏိုင္ပါေစ

www.winhlaing.org


က်ြန္ေတာ္တင္သမွ်ပိုစ့္ေတြ Facebook ကေနရယူခ်င္တယ္ဆိုရင္  ဒီမွာ like ေပးခဲ့ပါေနာ္
မန္ဘာ၀င္ခဲ့ျခင္းျဖင့္ ပိုစ့္အသစ္တင္တိုင္း မိမိ Gmail ထဲကိုတိုက္ရိုက္ေရာက္ရွိမည္ျဖစ္ပါသည္။
ထို႔ေၾကာင့္မန္ဘာ၀င္ခဲ့ဖို႔ဖိတ္ေခၚပါတယ္။
Tuesday, 11 March 2014

android အတြက္ လက္ေရးနဲ ့စာရိုက္လို ့ရမဲ ့ ျမန္မာ input method

စိုင္းသူနည္းပညာ ျပန္လည္မွ်ေဝျခင္း | 11.3.14 | Best Blogger Tips


android အတြက္ ျမန္မာစာ
====================================

Android ဖုန္းေတြအတြက္ ျမန္မာစာကုိ ကီးဘုတ္မွာမရုိက္ဘဲScreen ေပၚမွာ

ျမန္မာအကၡရာကုိ လက္ေရးနဲ႕ေရးလုိက္ရုံနဲ႕ စာရုိက္နုိင္မယ့္ Myanmar

Input

Method for Android ကုိတင္ေပးလုိက္ပါတယ္။

Myanmar Keyboard for Android အားရယူရန္

http://www60.zippyshare.com/v/42144426/file.html

Myanmar Font for Android အားရယူရန္ 


http://www35.zippyshare.com/v/4779031/file.html

======================================
ref ; than toe aung

special thank MMAS

Tuesday, 24 September 2013

Android Device ေတြေပၚမွာ ေနာက္ခံ သီခ်င္းေလးေတြနဲ႔ Video SlideShow လုပ္ခ်င္ရင္ (AndroMedia Video Editor v1.8)

Unknown | 24.9.13 | | Best Blogger Tips


 Cover art


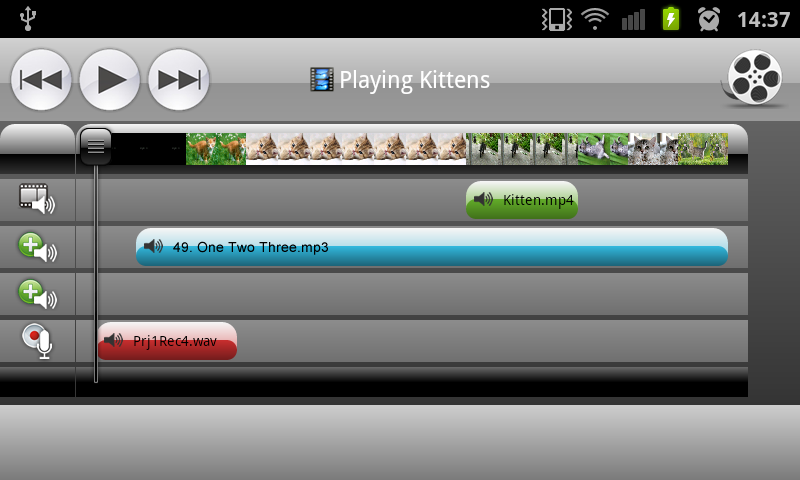
Android Device ေတြေပၚမွာပဲ မိမိတို႔ ဓာတ္ပံုေလးေတြကို ေနာက္ခံ သီခ်င္းေလးေတြနဲ႔ Video SlideShow အျဖစ္ ဖန္တီးေပးမဲ့ App ေလးပါ...HD (320p 480p 720p) ေတြနဲ႔ ၾကည္လင္စြာ ၾကည့္ရွဳ႕ႏိုင္မွာပါ... စိတ္ဝင္စားရင္ ေအာက္မွာ ေဒါင္းယူႏိုင္ၾကပါတယ္...။


 Andromedia Video Editor - screenshot


  Description


Video Editing App For Android Platform


AndroMedia is unique Video Editing App For Android Platform


Designed to be intuitive to use, AndroMedia is fully featured video editing program for creating professional looking videos in minutes. Making movies has never been easier.


* Export movies in standard definition or HD (320p 480p 720p)

* Drag and drop video clips for easy video editing

* Trim and Combine both video and audio files in two different editor.

* Apply effects and transitions and more

* Overlay title clips for captions and movie credits

* Apply Crop and Ken Burns effects to your video tracks

* Apply FadeIn and FadeOut effect to your audio tracks

* Supports MP4,MOV,JPG,PNG,MP3,WAV file formats

* Save login credentials to upload videos directly to YouTube from AndroMedia

* Easy to use layout


Click Here to Download


Sunday, 22 September 2013

Fort Conquer.apk

Unknown | 22.9.13 | | Best Blogger Tips


ကဲသူငယ္ခ်င္းတို႕အတြက္ကြ်န္ေတာ္ဒီ game ေလးတင္ေပးလိုက္ပါတယ္လက္ရွိကြ်န္ေတာ္ေဆာ႔ေန


တဲ႕game ေလးျဖစ္ပါတယ္ဒီေကာင္ကအေကာင္ေတြကိုမ်ိဳးစပ္ျပီးေဆာ႕ရတဲ႔gameေလးျဖစ္တယ္levelေတြ


မ်ားလာတာနဲ႔အမွ်ပိုေဆာ့လို႔ေကာင္းလာတယ္ေဆာ႔ခ်င္သူမ်ားေအာက္မွာယူႏိုင္ပါတယ္


Friday, 20 September 2013

Addroid Devices ေတြမွာ သူမ်ားေတြ မျမင္ေစခ်င္တာေတြ ပိတ္ထားခ်င္ရင္ (Vault-Hide SMS, Pics & Videos v3.8.08.22)

Unknown | 20.9.13 | | Best Blogger Tips


Lynn Nay: Android မွာသံုးတဲ့ Vault ဆိုတဲ့ Software ေလးကို Premium Version ရရင္တင္ေပးပါလားအကို မဝယ္ႏိုင္လို႔ပါ ... Free Version က သံုးရတာသိပ္အဆင္မေျပလို႔ပါ ကူညီေပးပါဦးေနာ္..


Addroid Devices ေတြက ဓါတ္ပံု,Video,SMS စ,တာေတြကို သူမ်ားမေျမင္ေစေအာင္ Hide လုပ္ေပးတဲ႔ App ေလးပါ...


Hides photos, videos and other data


NQ Mobile Vault, is a privacy protection app that hides and secures your
confidential photos, videos, SMS messages and call logs. It’s the most
popular app of its kind on the market today, used by more than a million
users to keep private data safe from prying eyes.


Vault eliminates the privacy risks you face if your phone is stolen or
lost by giving you control over what others can see. From unflattering
photos to work-related SMS messages, it gives you a safe place to store
any data that’s for your eyes only. It even allows you to make the Vault
app icon disappear on your phone if you don’t want anyone to know it
exists.


Features:

Gives you a private place to store your pictures, videos, text messages,
and call history: Your data is encrypted and can only be seen in Vault
when you enter the correct password.

Makes your private contacts invisible: Add a number to Vault and any
calls or messages from this number will only appear in your Vault. They
can’t be seen in your phone’s native SMS folder and call logs.

Premium Features

Protects your real Vault by creating one or more “fake” vaults (Premium
feature): If someone insists that you give them your password and
display your secret messages, you can show them a “fake” vault.

Monitors anyone who’s trying to see your Vault and photographs them in
the act (Premium feature): This feature requires an Android 2.3 (or
higher) device with a front-facing camera.

Lets you operate in Stealth Mode (Premium feature): This feature hides
Vault icon from your apps screen so no one can see it except you. To
access Vault, enter ##your password from your phone’s dial pad and hit
the “Send” or “Call” button.


Click Here to Download


Thursday, 19 September 2013

Android ဖုန္းမွ Internet Connection ကို Share သံုးနည္း

Unknown | 19.9.13 | | Best Blogger Tips


 ေမးတဲ႔လူ မ်ားေနလို႔ပါ စာေရးရမွာလည္းပ်င္းလို႔ .. :D အဆင္သင့္ေတြ႕တာေလးကိုပဲ ျပန္လည္မွ်ေဝေပးလိုက္ပါတယ္...။ အရင္ကလည္း တင္ေပးဖူးပါတယ္...


 Android ဖုန္းမွတစ္ဆင့္ Wifi ျပန္ေပးၾကရေအာင္


ဒီေန႔ေခတ္မွာ လူႀကီးလူငယ္ ေတာ္ေတာ္မ်ားမ်ားရဲ႕ လက္ထဲ ဖုန္းေတြကေတာ့ ႐ွိေနၾကပါၿပီ ....။ ျမန္မာ့ဆက္သြယ္ေရး အေနနဲ႔လည္း ဖုန္းလိုင္းကေန Internet သံုးလို႔ရတဲ့ ၀န္ေဆာင္မႈေတြ ေပးေနၿပီဆိုေတာ့
လူတိုင္းနီးပါး Internet နဲ႔ မေ၀းေတာ့ပါဘူး ...။ တစ္ခါတစ္ခါ ဖုန္းနဲ႔
အင္တာနက္သံုးရတာ အဆင္မေျပပါဘူး .... အလြယ္ေျပာရရင္ အားမရဘူးေပါ့ဗ်ာ .... :)
gtk မွာ Message ႐ိုက္ရတာ၊ Facebook မွာ Command ေရးရတာ၊ Post တင္ရတာေတြကအစ ကြန္ပ်ဴတာနဲ႔ ဆိုရင္ ပိုၿပီးအဆင္ေျပတာေပါ့ ....။


ဒီေတာ့ ကိုယ့္ဆီမွာ Android
ဖုန္းတစ္လံုး႐ွိၿပီး Internet သံုးေနၿပီဆိုရင္ အနီးမွာ႐ွိတဲ့ Wireless
Device (Laptop, Desktop(with wireless adapter) ေတြကို Wifi
ျပန္ေပးလို႔ရေအာင္လုပ္ၾကည့္ၾကမယ္ဗ်ာ ....။


ပထမဆံုး ဖုန္းကို Internet Connection ရေအာင္လုပ္လိုက္ပါ။


ၿပီးရင္ေတာ့ ဖုန္းရဲ႕ Settings ထဲသို႔ ၀င္လိုက္ပါ။ Settings ရဲ႕ Wireless & Networks ေအာက္မွ More သို႔ ၀င္ေရာက္လိုက္ပါ။အဲဒီကမွ Tethering & portable hotspot သို႔ ဆက္ၿပီး ၀င္ေရာက္လိုက္ပါ။ ၿပီးရင္ Configure Wi-Fi hotspot သို႔၀င္ေရာက္လိုက္ပါ။


ဒီအဆင့္မွာေတာ့ ကိုယ္ျပဳလုပ္ဖန္တီးမဲ့ Wifi Network တစ္ခုနဲ႔ ပတ္သက္တဲ့ အခ်က္အလက္ေတြကို ထည့္သြင္းေပးရမွာ ျဖစ္ပါတယ္။ အေပၚဆံုးမွာ SSID ဆိုတာကေတာ့ ကိုယ့္ဖန္တီးမဲ့ Network ကို နာမည္ ေပးတာပါ။ ႀကိဳက္တဲ့ နာမည္ ေပးလို႔ရပါတယ္။ (တစ္ျခားကြန္ပ်ဴတာက ဖမ္းတဲ့ အခ်ိန္မွာ ဒီနာ မည္ကို ျမင္ရမွာ ျဖစ္ပါတယ္။) လံုၿခံဳမႈအတြက္ Security တစ္ခုခုထားေပးၿပီး Password ေပးရပါမယ္။ (ကြန္ပ်ဴတာနဲ႔
ဖမ္းလို႔ Password ေတာင္းလာရင္ ဒီ Password ကိုထည့္ေပးရမွာမို႔
ေသခ်ာမွတ္ထားဖို႔လိုပါ တယ္။ လံုၿခံဳေအာင္ ထားရပါမယ္။ ဒီ Password ကိုသိမွ
Network ထဲသို႔ ၀င္ေရာက္ႏိုင္ပါမယ္။
) အားလံုးထည့္ၿပီးရင္ေတာ့ Save ကိုႏွိပ္လိုက္ပါ။


ဒါေတြလုပ္ၿပီးသြားရင္ေတာ့ Tethering & portable hotspot သို႔ ျပန္၀င္ေရာက္ၿပီး Portable Wi-Fi hotspot ကို အမွန္ျခစ္ျဖစ္ေအာင္ႏွိပ္ၿပီး enable လုပ္ေပးရပါမယ္။


ဒီအဆင့္မွာေတာ့ ကိုယ္သံုးမဲ့ ကြန္ပ်ဴတာကေန Wifi ဖမ္းၾကည့္ပါမယ္။ ကြန္ပ်ဴတာရဲ႕ Wifi ကို ဖြင့္လိုက္တာနဲ႔ သူ႕အထဲမွာ မိေနတဲ့ Network ေတြကိုေတြ႕ရပါမယ္။ အေပၚမွာကိုယ္ေပးခဲ့တဲ့
SSID ကို ေ႐ြးၿပီး ၀င္ေရာက္လိုက္ပါ။ Password ေတာင္းလာရင္ ကိုယ္ေပးခဲ့တဲ့
အေပၚက Password ကိုဘဲ ထည့္ေပးလိုက္ပါ။ Internet ကို ကြန္ပ်ဴတာနဲ႔
သံုးႏိုင္ပါၿပီ ......။


မွတ္ခ်က္။  ဖုန္းအမ်ိဳးအစားကိုလိုက္၍ Setting အေခၚအေ၀ၚမ်ား အနည္းငယ္ လြဲနိုင္ပါတယ္။


Android 4.2.2 အထက္ထိ ျမန္မာစာေတြ မွန္ေစတဲ့ MMSD Smart Zawgyi V1.2

Unknown | 19.9.13 | Best Blogger Tips


အရင္ Version v1.0 မွာမရတဲ့ ဖုန္းေတြကုိထက္ျဖည့္ေပးထားပါတယ္


Android version 1.6 ကေန 4.2.2 အထိအသုံးျပဳႏုိင္ပါတယ္။


Sony ေတြမွာလဲအသုံးျပဳႏုိင္ပါတယ္။


Y320, G610 ကဲ့သုိ႕ေသာဖုန္းေတြ ဝလုံးေတြမတက္ပဲအဆင္ေျပေျပေရးႏုိင္ဖတ္ႏုိင္ပါတယ္။


iMobile istyle မ်ားႏွင့္ တရုတ္ဖုန္းမ်ားအားလုံးအဆင္ေျပပါတယ္။


ဝလုံးတက္တဲ့ဖုန္းတုိင္းအဆင္ေျပေျပအသုံးျပဳႏုိင္ပါတယ္။


Root Access ရွိဖုိ႕ေတာ့လုိအပ္ပါလိမ့္မယ္။


Font Changer ျပီးသြားတဲ့အခါမွာ Restart ခ်ေပးဖုိ႕လုိအပ္ပါတယ္။


သူ႕အလုိုလိုေတာ့ Restart က်သြားေအာင္လုပ္ေပးထားပါတယ္. . .


တစ္ခ်ိဳ႕ဖုန္းေတြမွာ Font Change ျပီးျပီးျခင္း တရုတ္စာေတြတက္လာေပမဲ့


Restart ခ်ေပးလုိက္ရင္အဆင္ေျပသြားပါလိမ့္မယ္. . .


မည့္သည့္ Font မွမပ်က္ပါဘူး


Frozenkeyboard v1.1.3 တစ္ခါထဲထည့္ေပးထားပါတယ္။


အဆင္ေျပပါေစ...


Credit : http://www.myanmarmobilesoftwaredeveloper.com


 Click Here to Download


Friday, 13 September 2013

HUAWEI Mediapad 7Lite Firmware တင္နည္း

Unknown | 13.9.13 | | Best Blogger Tips


huawei mediapad 7 lite


ကူညီေတာင္းထားလို႔ မူရင္း ဆိုက္ဒ္ကေန  ျပန္လည္မွ်ေဝေပးလိုက္ပါတယ္ .. ျပီးေတာ့ က်ေနာ္တို႔ ဒီမွာက Huawei ဖုန္းေတြ သိပ္မသံုးၾကတာေၾကာင့္ Firware တင္နည္း အဆင့္ဆင့္ကို ကိုယ္တိုင္ ကိုယ္က် ရွင္းမျပႏိုင္တာ နားလည္ေပးပါခင္မ်ာ...။ ေအာက္မွာ ပံုေလးေတြနဲ႔ တဆင့္ခ်င္း ရွင္းျပေပးထားတာေၾကာင့္ လည္း အဆင္ေျပမယ္ထင္ပါတယ္ ။


 ဒီ Huwei ဖုန္းေတြက Firmware ျပန္တင္ရာမွာ Error တစံုတရာ တတ္ တတ္တယ္လို႔ Website ေတြေတာ္ေတာ္မ်ားမ်ားမွာ ဖတ္မွတ္ေလ့လာဖူးပါတယ္.... ။ အဲ့ဒီလို Error တခုခု တတ္လာခဲ့ရင္ ... SDCard ေကာင္းေကာင္း ကို Format ခ်ျပီး အသံုးျပဳၾကဖို႔ တိုက္တြန္းထားတာ ေတြ႕ရပါတယ္...။


Description


1. Download the application more convenient,
since you will no longer need to worry about where to download
applications for your tablet.


2. With touch screen you can have ultimate experience. 


3. A brand new 4.0 android system ,so you can play games with highly enjoyment.


Language
English


INSTRUCTIONS


 Turn On USB Debugging, at path of Huawei MediaPad ‘Settings>Applications>Development>USB Debugging and then check the option.


1: Extract the contents of the downloaded ROM. (ROM.zip ကို ျဖည္ပါ)


2: Connect the MediaPad to your computer via USB cable and copy the
DLOAD folder to the root of the Micro SD card. You can do so by using a
Card reader too. (SD Card  ထဲကို ေစာေစာက ျဖည္ထားတဲ႔ Zip ဖိုင္လ္ထဲက dload ဆိုတဲ႔ဖိုလ္ဒါကို  copy ကူးထည့္ပါ)


3: After copying is complete, power off the MediaPad. (SD Card ကို ဖုန္းမွာ ျပန္ထည့္ျပီး Power ပိတ္ပါ)


4: Press and hold the Volume Up key while pressing the Power button. The tablet will go to SD Card upgrade process. (Volume Up နဲ႔ Power button ကို တြဲႏွိပ္ေပးလိုက္ပါ သူ႕ဘာသာသူ Install လုပ္ေနပါလိမ့္မယ္)


5: You will see a bootloader screen as follows: 


Behold, the Green Droid! This implies that the update progress is ongoing, it should start shortly…


 (ေအာက္ကပံုေလးအတိုင္း ေတြ႕ရပါလိမ့္မယ္)


6:  The update is automatically detected. Let it install the update.


7: After installation is complete, you should see OK message on the screen.


Told you it will not take long! In any case, as soon as the update
to the new ICS is processed successfully,


Excellent!  You may now to remove the SD Card and press the Power key
until the tablet gets restarted. Check that everything is running
properly, and if nothing seems amiss, go ahead and turn off the device,
reinsert the SD card, boot the device, and delede de “dload” folder form
the SD card. It can also be removed (the folder, that is) from the
computer, but heck you could just leave it lie there, not gonna hurt
that big fat hard-drive of yours, is it now?


 Ref : http://www.android.gs/


 Root  လုပ္နည္းကို ေနာက္ပို႔စ္မွာ တင္ေပးပါ့မယ္...။


www.winkabarkyaw.net


Monday, 9 September 2013

Samsung Galaxy Ace 2 [I8160] Official v4.1.2 တင္ၿပီး Root လုပ္ၾကမယ္

Unknown | 9.9.13 | | Best Blogger Tips


Samsung Galaxy Ace 2 review


 ကူညီေတာင္းထားလို႔ တဆင့္ျပန္လည္မွ်ေဝေပးလိုက္ပါတယ္...။


Samsung Galaxy Ace2 ပိုင္ရွင္မ်ားအတြက္ Official 4.2.1 တင္နည္းေလးနဲ့.Root
လုပ္နည္းမ်ားကို အဆင့္ဆင့္ေဖၚျပေပးလုိက္ပါတယ္။ စမယ္ေနာ္။


  1.  Odin-3 

  2. Samsung USB Drive

  3. I8160XXMB4_I8160OXAMB4_EUR.zip


  1. သံုးခုစလံုးကိုေဒါင္းျပီး Desktop ေပၚမွာ extratct လုပ္ထားလုိက္ပါ။ Samsung USB Driver ကို PC မွာ Run ထားပါ။

  2. မိမိဖုန္း
    Phone USB debugging mode ကုို Enable လုပ္ေဆာင္ထားပါ။ (Settings –>
    Applications –> Development –> USB Debugging) 

  3. Batteryကို အနည္းဆံုး 50%ေလာက္ရွိပါေစ။ 


မိမိဖုန္းကိုပိတ္လုိက္ပါ။
Download Mode ထဲကိုဝင္နုိင္ဖုိ႔အတြက္ Volume Down+ Home+Power Button ေတြကို တျပိဳင္နက္တည္း 10 sec ေလာက္ၾကာေအာင္ဖိထားပါ။ Screen က
Flash ျဖစ္သြားျပီး Samsung Logo ေလးေပၚလာရင္ လႊတ္လုိက္ပါ။


Warning ဆိုတာေလးေပၚလာျပီဆုိရင္ Volume Up ကိုနွိပ္လုိက္ပါ။ Download Mode ထဲကိုေရာက္သြားပါလိမ့္မယ္္။


 ျပီးလွ်င္ မိမိဖုန္းကို USB Cable ျဖင့္  PCန႔ဲ.ခ်ိတ္ဆက္လိုက္ပါ။O din.exe  ေလးကိုဖြင့္လိုက္ပါ။


 ေစာေစာကေဒါင္းလို႔ရလာတဲ. I8160XXMB4_I8160OXAMB4_EUR.zip  ဖုိုင္ကို rar ျဖည္ျပီးရလာတဲ့. ဖုိင္ေတြကို Odin မွာရွိတဲ့


In-PIT    – > GT-I8160_EUR_XX_4G.pit


In-PDA   — >CODE_I8160XXMB2_932015_REV00_user_low_noship.tar


In-CSC   – >CSC_OXA_I8160OXAMB2_932015_REV00_user_low_noship.tar 


 ထဲေတြကိုအသီးသီထည့္လုိက္ပါ။


ထို.ေနာက္
Start ကိုနွိပ္လုိက္ပါ။  တခုခ်င္းစီကို install လုပ္ပါလိမ္.မယ္။
PASS! ဆိုျပီး အစိမ္းေရာင္ေလးနဲ.ေပၚလာရင္ေတာ. update လုပ္လို.ေအာင္ျမင္ျပီ
ျဖစ္ပါတယ္။ ဖုန္းက Reboot က်သြားပါမယ္။ျပန္တက္လာရင္ မိမိဖုန္းေလးဟာ Android
4..1.2 Official Jelly Bean ေလးနဲ.လန္းေနပါလိမ့္မယ္။


Root လုပ္မယ္ 


ACE2_I8160_JBRoot4.1.2 ေလးကိုေဒါင္းျပီး မိမိဖုန္း SD Card ထဲကို ကူးထည့္လုိက္ပါ။


Home+Volume
Up+Power Button ေတြကို တျပိဳင္နက္တည္း တဲြျပီး
10sec ေလာက္ၾကာေအာင္ဖိနွိပ္ထားပါ။ Screenက Flash ျဖစ္သြားျပီး Recovery
Mode ထဲကို ဝင္သြားပါလိမ့္.မယ္။ 


Apply Update From SD ကေနေစာေစာကထည္.ထားတဲ. ACE2_I8160_JBRoot4.1.2 by androidapkuser.zip   ဖိုင္ေလးကိုေရြးေပးပါ။ install လုပ္ပါလိ္မ္.မယ္။ 


Main
Menu ကိုျပန္သြားျပီး Reboot System Now
ကိုနွိပ္လုိက္ပါ။ Reboot ျပန္တက္လာရင္ Root Access ရျပီးသား 4.1.2 Jelly Bean
ေလးကိုေတြ.ရပါလိမ္.မယ္။ 


အားလံုးအဆင္ေျပၾကပါေစခင္ဗ်ာ။ 


Credit : androidfreeapklover 


Sunday, 8 September 2013

How To Root Samsung Galaxy Tab 3 7.0 Easy Method

Unknown | 8.9.13 | | Best Blogger Tips


Samsung-Galaxy-Tab-3-7-


 Samsung မွ သိပ္မၾကာခင္က ထြက္လာတဲ႔ Galaxy Tab 3 7.0 ကို Root လုပ္တဲ႔နည္းေလးပါ ... ေမးထားလို႔ မူရင္းအတိုင္း ျပန္လည္မွ်ေဝေပးလိုက္ပါတယ္...။


Rooting method for Samsung Galaxy Tab 3 7.0 is available now.


Today Learn How To Root Samsung Galaxy Tab 3 7.0 Easiest Method


Before You Begin


  1. Windows Based PC or Laptop.

  2. This method is tested & working on Galaxy Tab 3 7.0 Only.

  3. Download & Install Samsung Galaxy Tab 3 7.0 Drivers

  4. Enable USB Debugging in your Samsung Galaxy Tab 3.

  5. Your phone must be charged 50% minimum.

  6. Make a backup for your data safety.


Download Required Files:


Prerooted.tar.md5 (File Size : 1.13 GB)


Odin 3.07.zip (Download Odin 3.07 version only)


How To Root Samsung Galaxy Tab 3 7.0:


  1. Download & Extract Odin 3.07.zip in your computer.

  2. Download the Prerooted.tar.md5 file in your computer.

  3. Now switch off your device.

  4. Boot your device in Download Mode (By Pressing & Hold Volume Down Key + Home Button + Power Button).

  5. You should see a warning (Don't worry) Press Volume Up Key and continue.

  6. Please Follow all the instructions of Before You Begin section first (For Safe Rooting).

  7. Now launch Odin v3.07.exe file.

  8. Connect your device via USB Cable with PC.

  9. Wait for Odin to detect your device.

  10. It will show a Added message at the lower left box.

  11. After your device is detected , Click on PDA button and select Prerooted.tar.md5 file.

  12. Check the Auto Reboot option & Uncheck all other options like Repartition.

  13. Now Click on Start button.

  14. When you click on Start button ,A flashing process start running in Odin.

  15. After successful flashing you will see a PASS message.

  16. Your device shall reboot automatically.


Congrats!!! your device is rooted now (If you fail remove the .md5 extension from Prerooted.tar.md5 and flash again).


Friday, 6 September 2013

Android Version 4.0 xx , 4.1 xx , 4.2 xx Devices ေတြအတြက္ ျမန္မာစာေတြ မွန္ေစတဲ႔ ONE Browser

Unknown | 6.9.13 | | Best Blogger Tips


 Android Version 4.0 xx ,4.1 xx , 4.2 xx Devices ေတြအတြက္ ျမန္မာစာေတြ မွန္ေစတဲ႔  ONE Browser ေလးပါ...။  ျမန္မာစာေတြ ေရးတာေရာ / ဖတ္တာေရာ မွန္ေစတဲ႔ အျပင္ ျမန္လည္းျမန္ အျပင္အဆင္ ဒီဇိုင္းေလးကလည္း အရမ္းလန္းပါတယ္ .. သံုးၾကည့္လိုက္ေတာ့ ေတာ္ေတာ္ေလး အဆင္ေျပတာေတြ႕ရလို႔ ျပန္လည္မွ်ေဝေပးလိုက္ပါတယ္....။


http://one-browser.com/mobile/home


★Fastest --- New engine with an increase of 47% in rendering speed & browsing speed.

★Smartest--- Multi-window operation, page capture, website view switcher for Desktop and Basic view.

★Most Advanced--- Fully support HTML5 with industry top leading HTML5 test score.

★Download Management --- Offering the fastest download speed and the most effective file management.

★Traffic Saving--- Picture compression and website optimization with 85% traffic saving, especially in 2G network.Freely download ONE Browser; try the best choice of android browser.

What’s New:

1.Smart Website View: Automatically switch to Basic view in 2G network environment to get higher speed.

2.Download Optimization: No downloading pause while answering calls or running in background for better experience.

3.Dual Engine: Dual engines mode automatically switched for better page display.

Key Features:

1- Best HTML5 support: Fully support web standard HTML5 with industry top leading HTML5 test score. Access to all multimedia features and mobile gaming experience from the web;

2- Engine upgraded: Accelerate the Browsing speed by 47%;

3- Page Capture: Selected area, Screen & Whole page capture for Save, Read & Share;

4- Website View Switcher: Freely switch website view between Desktop and Basic view;

5- Font Size Customized: Adjust font size to improve readability;

6- Skin Engine: Enable user to change skins as they like and faster access to the content they want;

7- New UI Design: Simple and elegant-- a pure blue design to refresh your mind while browsing.


Click Here to Download


 ဝင္းကမာၻေက်ာ္


 www.winkabarkyaw.net


 Facebook Like Page


Android ဖုန္းေတြမွာ ျမန္မာစာေဖာင့္ ဒီဇိုင္းလွလွေလးေတြကို မိမိစိတ္ၾကိဳက္သြင္းၾကမယ္

Unknown | 6.9.13 | | Best Blogger Tips


ဒီတစ္ခါ အလန္းေလးလာၿပီ။ စက္ရုပ္ေတြမွာ ေဖာင့္ေတြကိုမိမိစိတ္ၾကိဳက္သြင္းလို႕ရႏိုင္မယ့္နည္းလမ္းေလးပါ။


ပထမဆံုးလိုအပ္တဲ့ FILE  ေတြကို အရင္ေဒါင္းလိုက္ပါ။


ttf ဖိုင္ေတြက သူ႕ခ်ည္းပဲဆို install ေမာင္းလို႕မရပါဘူး။ Root Explorer
ႏွင့္လုပ္ ရင္ရေပမယ့္ တစ္ခုခုမွားသြားရင္
ျပသနာတက္ပါတယ္။ဒါ့ေၾကာင့္ဒီနည္းေလးကို ေပးလိုက္တာပါ။


နံပါတ္ 1ႏွင့္ 2.မွာပါတဲ့ RA Rႏွင့္ Zip ဖိုင္ကိုျဖည္ၿပီး SD ကဒ္ထဲကို ထည့္လိုက္ပါ။


နံပါတ္3.မွာပါတဲ့ font installer apk ကို install ေမာင္းလိုက္ပါ။ၿပိးရင္ font installer ကိုဖြင့္လိုက္ပါ။


ေအာက္ပါအတိုင္းျမင္ရပါလိမ့္မယ္။ ေအာ္ အဲလိုျမင္ဖို႕ local က ေန ခုနက ttf ေတြထည့္ထားတဲ့ 


folder ထဲကို အရင္သြားလိုက္ပါ။ အဲဒါဆိုေအာက္ကလိုျမင္ရပါမယ္။အဲဒါက နံပါတ္1 ဖိုဒါ ကိုသြားၿပီး ပါတဲ့ 


ttf ဖိုင္ေတြပါ ။သူတို႕ရဲ႕ ဒီဇုိင္းကိုလည္း တစ္ခါတည္းျမင္ရပါတယ္။ ttf 
ဖိုင္ေတြက ဖုန္းမွာ ဒီတိုင္းဆိုဘာမွမျမင္ရပါဘူး။ဒီေဆာ့၀ဲထဲမွာျမင္ရတာပါ။


နံပါတ္2 မွာပါတဲ့ font ttf
2ဖိုင္ေတြကေတာ့ ျမန္မာစာေတြကို ဒီဇုိင္းေျပာင္းမသြားပဲ
ရိုးရိုးေဇာ္ဂ်ီေဖာင့္အတိုင္း ရွိေနပါမယ္။English
ေတြပဲဒီဇိုင္းေျပာင္းသြားမွာပါ။ 


နံပါတ္ 1.မွာပါတဲ့ Font ttf ဖိုင္ေတြက ျမန္မာစာေတြကိုပါ ေဖာင့္စတိုင္ေျပာင္းလဲေပးႏိုင္ပါတယ္။


ပထမဆံုးကိုယ္ၾကိဳက္ရာဖိုင္တစ္ခုခုကို install လုပ္ၾကည့္လိုက္ပါ။


Install ကိုႏွိပ္လိုက္ပါ။


Reboot ေတာင္းရင္ yes ကိုႏွိပ္လိုက္ပါ။


ျပန္တက္လာရင္ေတာ့ ကိုယ္သြင္းထားတဲ့ ေဖာင့္ဒီဇိုင္းလွလွေလးေတြကို ျမင္ေတြ႕ရမွာပါ။


ေအာက္မွာ နမူနာက်ေနာ္စမ္းထားတာေတြပါ။


အေပၚကပံုကေတာ့ ArtHouse05.ttf ကိုထည့္ထားတာပါ။


ဒီပံုကေတာ့ Dancing Zawgyi.ttf ကိုထည့္ထားတာပါ။


ဒါကေတာ့ pyinoolwin.ttf ကိုထည့္ထားတာပါ။


ဒါကေတာ့ Sony.ttf ကိုသြင္းထားတာပါ။

ဒီထက္မက ttf file ေတြလိုခ်င္ေသးရင္ အင္တာနက္ဖြင့္ၿပီး Sever ဆိုတဲ့ေနရာကေန ရွာေဖြၿပီးသြင္းႏိုင္တယ္ေနာ္။


တျခား ေဖာင့္ေတြကိုလည္း ကလိၾကည့္လိုက္ပါဦး။ေပ်ာ္ရႊင္ပါေစ။ 


  Credit : IT စုဗူး


Wednesday, 4 September 2013

၉ နဝင္း ပုတီးစိပ္နည္း For Android

Unknown | 4.9.13 | | Best Blogger Tips


 အာကာ: ၉ နဝင္း ပုတီးစိပ္တဲ့ ေဆာ့ဝဲေလး လိုခ်င္လို႔ပါ....


၉ နဝင္း ပုတီးစိပ္နည္းကို Android Devices ေတြေပၚကေန ေလ့လာခ်င္သူေတြအတြက္ပါ အဆင္ေျပသြားေအာင္ ျပန္လည္မွ်ေဝေပးလိုက္ပါတယ္...။


JellyBean 4.1 xx 4.2 xx ေတြမွာ ျမန္မာစာ ေရးတာ / ဖတ္တာ မွန္ဖို႔

Unknown | 4.9.13 | Best Blogger Tips


JellyBean ေတြမွာ ျမန္မာစာ ေရးတာဖတ္တာမွန္ဖို႕ မလြယ္ေသးပါဘူး။အဲဒီထဲကမွ 


ဒီေဆာ့၀ဲေလးႏွစ္ခုသံုးရံုႏွင့္ Facebook ႏွင့္ အျခား Web Site ေတြကို ၾကည့္ရႈရာမွာ


စာလံုးေပါင္းေတြ ကို ဖတ္တာေရာ၊ေရးတာပါ မွန္လာခဲ့ပါျပီ။


 ကဲဖတ္တာမွန္ ဖို႕အတြက္ကေတာ့ အားလံုးသိၾကတဲ့ ONE
Browser
ကိုသံုးလိုက္ပါ။Facebook ႏွင့္ အျခား Website မ်ားကို
ျမန္မာစာမွန္ေအာင္ဖတ္ႏိုင္ပါတယ္။


ဒါကေတာ့ ေဆးမစားမီပံု ၊အဲမွားလို႕ ONE Browser မသံုးထားတဲ့ပံုပါ။


ျမန္မာစာဖတ္ရတာ အဆင္မေျပပါဘူး။


ေအာက္ကပံုကိုၾကည့္လိုက္ပါ။ဒါကေတာ့ ေဆးစားၿပီးပံု အဲ ONE Browser သံုးထားတဲ့ပံုပါ။


ျမန္မာစာဖတ္ရတာ အဆင္ေျပလာပါတယ္။


ဒီ Browser ေလးဟာေပါ့ပါးပါတယ္။ ဖိုင္ဆိုဒ္လည္းေသးပါတယ္။ အျပင္ဆင္က အရမ္းလန္းပါတယ္။


သံုးၾကည့္လိုက္ပါ။ဒီမွာေဒါင္းလိုက္ပါ။


ေအာက္မွာေပးမယ့္ APP ကေတာ့ ျမန္မာစာေရးတာမွန္ေစမယ့္ Keyboard ေလးပါ။


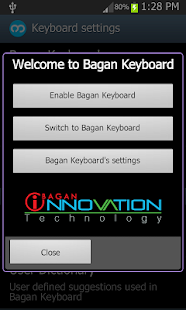
အားလံုးသိၿပီးျဖစ္တဲ့ BaganKeyboard Pro V1.6.9 ေနာက္ဆံုးဗားရွင္းေလးပါ။


ကဲ jelly bean မွာ ျမန္မာစာေရးတာဖတ္တာမမွန္လို႕ စိတ္ညစ္ေနသူေတြအတြက္
လာပါၿပီ။ အားနည္းခ်က္ေတြကို ျပန္လည္ျပင္ဆင္ၿပီး ထြက္လာပါၿပီ။ သေ၀ထိုးေတြ
ေရွ႕ေနာက္ မေရာက္ေအာာင္  Auto ျခားေပးျခင္း၊အသတ္မ်ား ေရွ႕ေနာက္မေရာေအာင္
Auto ျခားေပးျခင္းေတြ ကိုျဖည့္စြက္ထားပါတယ္။


ဘာေတြလုပ္ႏိုင္ေသးလဲဆိုတာ ေအာက္မွာ ၾကည့္လိုက္ပါ။


Bagan Keyboard Pro - screenshot thumbnail Bagan Keyboard Pro - screenshot thumbnail


Bagan Keyboard Pro - screenshot thumbnailBagan Keyboard Pro - screenshot thumbnail


1.version
(1.6.7) ကစျပီး keyboard ရဲ႕ height ကို လိုအပ္သလို ျပင္ယူလို႔ရပါျပီ။ setting
မွာAdjust Key Height မွတဆင့္ မိမိစိတ္ၾကိဳက္ ျပဳျပင္ယူႏုိင္ပါတယ္။


2.Facebook
မွာ ေရးတဲ့အခါ မွန္ဖို႔အတြက္ Android Jelly Bean ကို သံုးထားတယ္ဆိုရင္ Keyboard
Setting(Long press ENTER)မွာ Jelly Bean Fix ကို On ေပးပါ။ ေရးတဲ့အခါေရာ ျပန္ဖတ္တဲ့အခါမွာပါ
မွန္ကန္ဖို႔အတြက္ ဆိုရင္ေတာ့ Facebook Fix ကိုပါ ထပ္ On ေပးပါ။


3.(1.6.7) မွာ (.) crash ျပသနာကို ေျဖရွင္းေပးထားပါတယ္။ 


 4.အသတ္ရိုက္လိုက္ရင္ (င် တ် )ဒီလိုျဖစ္ေနသူေတြအတြက္ setting မွာ type as unicode ကို ျပန္ off ေပးပါ.. unicode ရုိက္ဖို႔လိုအပ္မွသာ ျပန္
on ေပးပါ။


5. ဂ ငယ္ႏွစ္လံုးဆင့္ေပၚရန္ အလည္မွာပါတဲ့ S္ ကို သံုးၿပီး (ဂ+S္+ဂ )လို႕ရိုက္ ၾကည့္လိုက္ပါ။


6.v1.6.8 မွာ (ႏိုင္)လို႕ေရးရင္၊(ရွင္း)လို႕ေရးရင္(ႏိုင္န)ႏွင့္(ရွင္းရ)ျဖစ္သြားတဲ့ ျပသနာကို လည္းရွင္းေပးထားပါတယ္။


ၾကိဳက္တယ္ဆိုေအာက္မွာေဒါင္းသြားလိုက္ပါ။


Tuesday, 3 September 2013

Hide It Pro 3.1.1 ( သူမ်ား မၾကည့္ေစခ်င္တဲ႔ Video , Pictures ,Music , Application ေတြကို ေဖ်ာက္ထားခ်င္ရင္)

Unknown | 3.9.13 | | Best Blogger Tips


Hide It ProHide It Pro


မိမိ တို႔ ဖုန္းထဲက သူမ်ားေတြ မၾကည့္ေစခ်င္တဲ႔ Video , Pictures ,Music နဲ႔ Application မ်ားအျပင္ Message ေတြကိုလည္း Hide လုပ္ထားႏိုင္ပါတယ္...

Root Access ေတာ့ ရွိဖို႕လိုပါတယ္...

Android Version v2++ အထက္မွာ အသံုးျပဳႏိုင္ပါတယ္...


Hide Pictures ,Videos, Applications, Messages , Calls in your phone.
COMPLETELY FREE and UNLIMITED version. The app is cleverly disguised as
"Audio Manager" in the App Drawer. Disguises itself as a Audio Manager
app which can be used to turn the volumes up and down. but if you Long
press on the Audio Manager title the actual Hide It Pro app will launch,
which is basically your secret vault of pics/videos/messages/apps
etc... Read More


Click Here to Download


Sunday, 1 September 2013

GO SMS Pro 5.21 Apk For Android

Unknown | 1.9.13 | | Best Blogger Tips


GO SMS Pro apk 


 ဘိုဘို: အစ္ကိုေရ Next Launcher နဲ႔ Go Launcher ျပီးေတာ့ Go SMS Pro ေလး လိုခ်င္လို႔ပါ ကူညီပါဦးေနာ္ ေက်းဇူးကမာၻပါဗ်ာ......


SMS ကို ဒီဇိုင္း ဆန္းဆန္းေလးေတြနဲ႔ အလြယ္တကူ ပို႔ခ်င္သူေတြ အတြက္ပါ....


GO SMS Pro - 50,000,000+ users' choice, all time #1 messaging app to replace the stock!


It comes with 200+ beautiful themes, 800+ emoticons, free SMS & MMS,
auto-reply, scheduled message private box, and much more. Faster,
safer, tons of features - messaging has never been so fun and efficient!
MMS problems may caused by different factors, such as Android versions,
networks connectivity, phone models, etc. If you encounter this kind of
problem, please email us with the detail info and... Read More


GO SMS Pro apkGO SMS Pro apk


Click Here to Download


Thursday, 29 August 2013

ဘိလိယက္၀ါသနာရွင္ေတြအတြက္ Pool Break Pro 2.3 Apk

Unknown | 29.8.13 | | Best Blogger Tips


Android
phone ပိုင္ရွင္သူငယ္ခ်င္းတို႔အတြက္ အပ်င္းေျပ ဘိလိယက္ထိုးလို႔ရေအာင္
တင္ေပးလိုက္ပါတယ္ဗ်ာ။ ဒီ game ေလးကိုမကစားဖူးၾကေပးမဲ့လည္း

သူနဲ႕ဆင္တူတဲ့
ဒီလို game ေလးေတြကိုေတာ့ ကစားဖူးၾကမွာပါ။ ဒီ game ေလးကလည္းအရင္ game
ေတြနဲ႕ ခပ္ဆင္ဆင္ပဲေလ။ ဒီ game ေလးမွာ ကစားလို႔ရတဲ့

အမ်ိဳးအစားေတြကေတာ့ 
US 8-Ball Pool ,UK 8-Ball Pool ,9-Ball Pool ,One Pocket Pool , Straight
or 14.1 Continuous Pool ,Carom (or 3-cushion) Billiards,

Pool
Drills, Place-n-Shoot Pool , Regular Snooker ,Snooker 6-Reds , Snooker
10-Reds , Carrom (three board styles) , Crokinole board game ေတြပါပဲဗ်ာ။


ကစားနည္းေတာ္ေတာ္စံုလို႔လဲ ၾကိဳက္ၾကလိမ့္မယ္လို႔ထင္ပါတယ္ဗ်ာ။ ဒီ
game ေလးကို ကစားခ်င္ရင္ေတာ့ andorid version 2.2 နဲ႕အထက္မွာ
ကစားႏိုင္ပါတယ္ဗ်ာ။


ေအာက္က link ေတြကေန download လုပ္ႏို္င္ပါတယ္ဗ်ာ။ 


အားလံုးအဆင္ေျပၾကပါေစဗ်ာ။ 


Talking SMS and Caller ID

Unknown | 29.8.13 | | Best Blogger Tips


ေငြစည္သူ: အကို ေရ ဖုန္းလာရင္ ဖုန္းေခၚတဲ့သူရဲ႕ Contact Name ကိုရြတ္ျပတဲ့ေဆာ့ဝဲေလး ရွိရင္ တင္ေပးပါဦး လိုခ်င္ လို႔ပါ ေက်းဇူးတင္ ပါတယ္ခင္မ်ာ....


ဒါေလးကေတာ့ Android Devices ေတြအတြက္ ဖုန္းဝင္လာရင္ျဖစ္ေစ Massage ဝင္လာရင္ျဖစ္ေစ ေပးပို႔ , ေခၚဆို သူရဲ႕ နာမည္ကို အသံနဲ႔ ေျပာေပးမဲ့ App ေလးပါ (အဂၤလိပ္လိုေရးထားတဲ႔ နာမည္ေတြပဲ အသံထြက္ေပးႏိုင္ပါတယ္).. အားလံုး စမ္းသပ္ႏိုင္ဖို႔ ျပန္လည္မွ်ေဝေပးလိုက္ပါတယ္...။


Description


Let the app speak out you, who is calling and sending you messages.
Talking SMS and Caller ID ( also known as Spoken caller name) is an enhanced caller id android application which speaks up the name of the calling person or the person sending SMS. This application also has the ability to speak the sms contents.


Features:


1.Speaks the name of the calling person when your phone is ringing


2.Speaks the name of the SMS sender as soon as the SMS arrives


3.Reads SMS contents (available in paid version only)


4.Avoid reading unknown SMS. That is, only read SMS from your contacts (available in paid version only)


5.Remains silent when your ringer volume is silent – no speech for call or SMS


6.Supports quite on turn or flip. It may be inappropriate at times for the speech to continue. For example a very long SMS is sent by your friend and you don’t it all to be read out. You can flip or turn your phone and the speech stops (available in paid version only)


7.Custom speech settings for SMS and Call (configurable in paid version only). Free version only says call from xxxx or message from xxx (in paid version you can change it to anything)


8.No ringtone while speech. This is achieved by setting Silent ringtone from Settings -> Sound -> Phone ringtone ->Silent ringtone


9.Ability to change Speech pitch and speed of the speech


Feel free to contact if you come across any issues. Your constructive criticism would be highly appreciated


Keywords: voice sms and call, Talking SMS, SMS, Caller ID, CallerID, Talking, Talking Caller ID, Voice Caller ID, enhanced caller id, talking message app , sms reader, car sms


Translations:
We want to translate this app into different languages, if you can help, please contact us.


TROUBLESHOOTING:
"Name or message not announced when I receive a text" - This is most likely due to another app installed on your device. Please follow the instructions below.


SETUP INFO FOR GOSMS, HANDCENT, VLINGO USERS:


-GO SMS >> Settings >> Advanced Tab >> Receive Settings >> uncheck "Disable other message notification"


-HANDCENT >> Settings >> Application Settings >> Disable


-VLINGO, Within phone settings, change voice recognizer from Vlingo to Google Voice.


Click Here to Download