Showing posts with label USB. Show all posts

Monday, 23 December 2013

ဝင္းဒိုး images ဖိုင္ေတြကို USB Pendrive တြင္ ထည့္သြင္းနည္း ႏွင့္Novicorp WinToFlash 0.8.0009 [BETA]

Unknown | 23.12.13 | | Best Blogger Tips


Desktop PC , Laptop PC နဲ႔ Netbook ေတြကို USB Pendrive,Flash Drive

တို႔ေတြကေန  Windows တင္ၾကမယ္ဆို ဒါေလးကိုလည္းေဆာင္ထားသင့္ပါတယ္။

 Windows XP, Windows 2003, Windows Vista, Windows 2008, Windows 7, 

Windows 8 နဲ႔ Windows 8.1 အထိကို support ေပးပါတယ္

CD , DVD ေခြမရွိလို႔ မပူရေတာ့ ဘူးေပါ့ဗ်ာ။ Pendrive ထဲမွာထည့္ windows တင္လိုက္

တင္ၿပီးရင္  windows ေလးကို ျပန္ဖ်က္လိုက္ရံုပဲ။ Pendrive ကို တျခား ေနရာမွာ ျပန္သံုးလို႔ ရေတာ့

ေငြနည္းနည္း ေခြ်တာ လို႔ရတာေပါ့ 

ဒါေလး ေဒါင္းၿပီး အသံုးျပဳ႕မယ္ဆိုရင္ နည္းနည္းေလာက္ ေျပာျပမယ္ေနာ္

( ၁ ) WinToFlash ေဒါင္းထားတဲ့ set up ဖိုင္ကို ကလစ္ ၂ ခ်က္ေခါက္ၿပီး extract လုပ္လိုက္ပါ
         ေမးလာတဲ့ စာကို ဘာမွမေျပာင္းပဲနဲ႔ Extract လုပ္လိုက္ပါ။ 
( ၂ ) မူရင္း ဖိုင္ထဲမွာပဲ နာမည္ တူနဲ႔ Folder သေဘာမ်ဳိး ရွိေနပါလိမ့္မယ္။ထပ္ဖြင့္လိုက္ပါ


( ၃ ) အေပၚက ပံုမွာျပထားသလို set up ဖိုင္ေလးကို ကလစ္ ၂ ခ်က္ႏွိပ္ၿပီး ဖြင့္လိုက္ပါ ခင္ဗ်ာ


( ၄ ) ေအာက္ကပံုအတိုင္းပြင့္လာမယ္ ခင္ဗ် ေစာင့္ေပးပါအံုး


( ၅ ) ဒီလိုအစိမ္းေရာင္ မွန္ျခစ္ကေလးနဲ႔ ေပၚလာၿပီ ဆိုရင္ အမွန္ျခစ္ကေလး ကို ႏွိပ္လိုက္ပါ။


( ၆ )Next ကို ႏွိပ္ၿပီးေတာ့ ဆက္သြားလိုက္ပါ


( ရ ) Next ကို ဆက္သြားမယ္ ဆိုရင္ images ဖိုင္ အျဖစ္သံုးမယ့္ os ေနရာကို  ၁ ဆိုတဲ့ ေနရာမွာ
         ေရြးခ်ယ္ဖို႔အတြက္ select ကိုႏွိပ္လိုက္ပါ။ ၂ ဆိုတာကေတာ့ မိမိ အသံုးျပဳ႕မယ့္ USB Pendrive
         ရွိမယ့္ေနရာ ကို ျပေပးရမယ့္ ေနရာပါ။ မိမိ ရဲ႕ Flash Drive ကို ျပေပးလိုက္ပါ။ ၿပီး ၿပီ ဆိုရင္ 
         Run ဆိုတာကို ႏွိပ္ေပးလိုက္ပါ


(၈ ) အဲ့ဒီလိုျပေပးလိုက္ ၿပီး ၿပီ ဆိုရင္ Image ဖိုင္ေတြကို usb drive မွာ ကူးေနပါၿပီ ခင္ဗ်ာ
 

ဒါေလးပါပဲ ခင္ဗ်ာ။ကူးၿပီးေအာင္ေတာ့ နည္းနည္း ေစာင့္ေပးရပါတယ္

ၿပီးဆံုးေၾကာင္း အေၾကာင္းၾကားေပးျခင္း ႏွင့္အတူ တခါတည္း Windows ဖိုင္ကို

ဒီထဲ ကေန run မလားလို႔ေမးတာ ရွိပါတယ္။ အဲ့ဒါကေတာ့ ေဘာ္ဒါတို႔သေဘာပါ ခင္ဗ်ာ

ေဆာ့ဝဲ ေလးကို ေအာက္မွာေဒါင္းယူႏိူင္ပါတယ္

DOWNLOAD FROM MILOSHARE | TUSFILES

အသံုးျပဳ႕နည္း ကို Video အျဖစ္ၾကည့္မယ္ ဆိုရင္ ဒီမွာ ဝင္ၾကည့္ပါ


ကိုလတ္(ကြ်ဲဆင္း)


Installing Windows from a flash drive! An application that allows you to completely transfer the setup Windows XP, Windows 2003, Windows Vista, Windows 2008, Windows 7, Windows 8,Windows 8.1 on the USB drive in a few mouse clicks. This means that you can install Windows from a flash card, HDD or other storage device to your computer or netbook. And it's not all she can do. WinToFlash can transfer your live CD / DVD onto the USB drive, for example, BartPE. After all the technological manipulation, you can completely clear the flash card and format it in Windows for everyday use.

New in this Version [0.8.0009] 12/21/2013
- Added Windows 8.1 support
- Added option "Copy all files and folders from original CD" for Windows XP/2003
- Language bugs fixes

Sunday, 11 August 2013

USB,Memory Card ေတြ Format ခ်မရရင္ (Lexar USB Formatting Tool 2013)

Unknown | 11.8.13 | Best Blogger Tips


Lexar USB flash drive


 USB,Memory Card ေတြ Format ခ်မရရင္ ဒီ USBTool ေလးနဲ႔ ခ်ေပးႏိုင္ပါတယ္...။


Lexar® provides the performance and reliability needed to get the most from your digital device. Whether shooting photos, capturing video, watching_movies on a tablet, or simply transferring and sharing files on the go. Sometimes you have a problem with Lexar USB flash drive formatting, writable, etc. please use Lexar USB format tool 2013.Insert Lexar USB flash drive in your computer USB post. Open Lexar USB format tool-2013 and choose your Lexar USB flash drive then press format .Wait until updating Lexar flash drive firmware.


Lexar USB flash drive


Lexar USB Format Tool 2013

Program Version: v 2013

OS Support: Windows XP, Windows Vista, Windows 2003, Windows 2008, Windows 7, mac

License: free


Lexar USB format tool 2013


Click Here to Download


Wednesday, 17 July 2013

Multiple Bootable Operating Systems ေတြကို USB Stick တစ္ခုထဲမွာ အင္စေတာလုပ္မယ္

Unknown | 17.7.13 | | Best Blogger Tips


USB Stick ကေန windows အင္စေတာလုပ္နည္း 
ကို ေရးေပးဖူးပါတယ္။အဲဒီလို လုပ္ဖို ့အတြက္ microsoft ရဲ  ့ windows 7
usb/dvd download  tool ကို အသံုးျပဳပါတယ္။Windows 7 usb/dvd download tool
က operating system တစ္ခု တည္းကို ပဲ usb stick မွာ
အင္စေတာလုပ္ေပးႏိုင္ပါတယ္။Operating systems အမ်ားအျပားကို usb stick မွာ
အင္စေတာလုပ္ခ်င္ရင္ေတာ့ ေအာက္ မွာ ဆက္ဖတ္ပါ။USB stick ကေန windows os
ဒါမွမဟုတ္တစ္ျခား os ေတြကို အင္စေတာလုပ္ဖုိ ့ iso ဖိုင္ကို
အသံုးျပဳရပါတယ္။ISO ဖိုင္ဆို တာ disk image file အမ်ိဳးအစားတစ္ခု
ျဖစ္ပါတယ္။အင္တာနက္ကေန windows os ေတြ ေဒါင္းလုပ္ရရွိရင္ iso ဖိုင္အေနနဲ
့ရရွိပါတယ္။တကယ္လို ့သင္ဟာ ဆိုင္က windows os အေခြကို ၀ယ္ယူထားတယ္ဆိုရင္ PowerISO လို မ်ိဳး ေဆာ့၀ဲသံုးျပီး ၀င္းဒိုး အေခြကေန iso ဖိုင္ ျပဳလုပ္ႏိုင္ပါတယ္။


Windows
os တစ္ခု ကို usb stick မွာ အင္စေတာလုပ္ဖို ့ usb ရဲ ့ storage ဟာ 4 gb
ေလာက္ေနရာရွိရပါမယ္။Windows os အမ်ားအျပားကို  usb stick မွာ
အင္စေတာလုပ္ဖို ့ usb stick ရဲ ့ storage က လံုေလာက္တဲ့ အေနအထားမွာ
ရွိရပါမယ္။ကြ်န္ေတာ့္မွာ 4gb ပဲဆန္ ့တဲ့ usb stick ပဲရွိတဲ့အတြက္  
ဒီေဆာင္းပါးမွာေတာ့ windows os ေတြကို အင္စေတာမလုပ္ဘဲ kaspersky rescue
disk iso, bitdefender rescue cd iso စတာေတြကို
သံုးျပီးစမ္းသပ္ပါတယ္။ဆိုလို ခ်င္တာက windows os iso ေတြ တစ္ျခား os iso
ေတြကို သံုးႏိုင္ပါတယ္။


Download MultiBootUSB


Portable
freeware တစ္ခု ျဖစ္ပါတယ္။Application ကို run ျပီးရင္ Step 1 မွာ usb
stick ကို ေရြးေပးပါ။Step 2 မွာေတာ့ iso ဖိုင္ကို ေရြးေပးပါ။ျပီးရင္ Create
ကို ႏွိပ္ပါ။


ashampoo 03


ျပီးရင္ေတာ့ အခ်ိန္အနည္းငယ္ေစာင့္ပါ။


ashampoo 04


ျပီးသြားရင္
ေတာ့ အေပၚကအဆင့္အတိုင္းပဲေနာက္ထပ္ os တစ္ခု usb stick မွာ
အင္စေတာလုပ္ပါ။USB stick နဲ ့ဆန္ ့သေလာက္ os ေတြ
အင္စေတာလုပ္ႏိုင္ပါတယ္။အားလံုးျပီးသြားရင္ QEMU ကို ႏွိပ္ပါ။QEMU က machine
emulator and virtualizer ျဖစ္ျပီး သင့္ usb stick မွာ အင္စတာလုပ္ထားတဲ့
os ေတြ တကယ္အလုပ္ လုပ္မလုပ္စမ္းသပ္ႏိုင္ပါတယ္။Usb stick ကို စမ္းသပ္ဖို ့
အတြက္ Boot USB ကို ႏွိပ္ပါ။ကြ်န္ေတာ့္စမ္းသပ္ခ်က္မွာေတာ့ ဒီ feature
ကေကာင္းေကာင္းအလုပ္မလုပ္ပါဘူး။အဲဒီအတြက္ windows ကို restart ခ်ျပီး boot
menu မွာ usb stick ကေန boot တက္ျပီးစမ္းသပ္ၾကည့္ေတာ့အဆင္ေျပတာေတြ ့ရပါတယ္။


ashampoo 01


Download YUMI – Multiboot USB Creator


ေနာက္
tool တစ္ခု ကေတာ့ YUMI – Multiboot USB Creator ဆို တဲ့ freeware ပါ။Step 1
မွာ usb stick ကို ေရြးေပးပါ။ Step 2 မွာ windows ကို အင္စေတာလုပ္ရင္
Windows Vista/7/8 Installer ဒါမွမဟုတ္ Windows XP ကို အင္စေတာလုပ္ရင္
Windows XP Installer ကို ေရြးပါ။ျပီးရင္ iso ဖုိင္ကို ေရြးေပးျပီး Create
ကိုႏွိပ္ပါ။


ashampoo 05


အခ်ိိန္အနည္းငယ္ေစာင့္ပါ။


ashampoo 07


OS
တစ္ခု အင္စေတာလုပ္ျပီးရင္ ေနာက္ os တစ္ခု အင္စေတာလုပ္ဖို
့အေပၚကနည္းအတုိင္းလုပ္ပါ။YUMI မွာေတာ့ QEMU (machine emulator and
virtualizer ) မပါရွိတဲ့အတြက္ ၀င္းဒိုးကို restart ခ်ျပီး usb ကေန boot
တက္ျပီး အလုပ္ လုပ္မလုပ္စမ္းသပ္ႏိုင္ပါတယ္။အိုေကတယ္ဆိုရင္ေတာ့ သင့္ USB
stick ကေန windows os အမ်ားအျပားကို အင္စေတာလုပ္ႏိုင္ပါျပီ။


 Credit to:  http://www.kothuya.com


USB တစ္ခုထဲမွာ Window OS ေတြ ထည့္နည္းကို အဆင္မေျပေသးရင္  ဒီေနရာမွာ  နဲ႔  ဒီေနရာ  ေတြမွာ ဆက္လက္  ေလ့လာႏုင္ပါေသးတယ္...။


Friday, 12 July 2013

USB မွ Virus ၀င္ျခင္းကို 100% ကာကြယ္ေပးႏိုင္တဲ႕ USB Virus Scan v2.43 Build 0706 Final + Serial

Unknown | 12.7.13 | Best Blogger Tips


https://blogger.googleusercontent.com/img/b/R29vZ2xl/AVvXsEikinh4B9zM1QypmAb4stx3O5aRhAtpz9cg0Mva2OMsxIKsPbKY9X_Pmc9cC1scB1WJeVOUYs9GED6vUEWb1wzUAD5VVjkLlkuE7ROw5TqVgYMHsAEmfGvw5Zup3NGRlPptsbana0QFS6zo/s200/USB+Virus+Scan+2.42+Build+0328.png


ကြန္ျပဴတာကို Virus ကိုက္ျပီဆိုရင္ အမ်ားအားျဖင့္ေတာ့ USB ကေန Virus ၀င္ျပီး ကိုက္တာမ်ားပါတယ္။ အဲ ဒါေၾကာင့္ အခုကၽြန္ေတာ္တင္ေပးလိုက္တာကိုေတာ့ အားလံုးဘဲ ၾကိဳက္ႏွစ္သက္လိမ့္မယ္လို႕ထင္ပါတယ္။ သူ႕ရဲ႕မူရင္းမွာေတာ့ USB ကေန Virus ၀င္ျခင္းကို 100% ကာကြယ္ေပးႏိုင္တယ္လို႕ကို ခုိင္ခိုင္မာမာ အာမခံ ထားတာေတြ႕ရပါတယ္။ တကယ္လည္းေကာင္းပါတယ္ဗ်ာ။ ကၽြန္ေတာ္လည္းဒါေလးဘဲသံုးထားပါတယ္။ အ သံုးျပဳရတာ ေပါ့ေပါ့ပါးပါးရွိျပီး Antivirus ေတြနဲ႕ တြဲဖက္အသံုးျပဳႏိုင္ပါတယ္။ USB လို႕သံုးႏႈန္းထားတယ္ဆို တာက ၿခံဳငံုျပီးေျပာျပထားတာပါေနာ္။ Pen Drives , USB Cameras , USB Flash cards , USB MP3 players , USB Audio players , External hard drives , Pocket PCs , Mobile phones , iPod’s and iPhone’sv စတာေတြ ကိုလည္း USB အျဖစ္သက္မွတ္ၾကည့္မယ္ဆိုရင္ ဒီေကာင္ေတြထဲကလည္း Virus မ၀င္ႏိုင္ေတာ့ပါဘူးဗ်ာ။


ဒီထက္အေသးစိတ္သိခ်င္တယ္ဆိုရင္ေတာ့ ေအာက္မွာ ရွင္းျပေပးထားပါတယ္။


http://image.bayimg.com/dd121f2c9bf76841a482e07799aadaaa6735cc9d.jpg


USB Virus Scan provides fully USB security solutions , it not only allows you to gain full control of every usb port, but also provides 100% protection against any malicious programs trying to attack via USB storage. All data in your computer and usb drives will get fully protection provided by USB Virus Scan.


USB thumb drives and removable hard disks are now common throughout the workplace. They have considerable storage capacity and great for productivity. However, they also cause new problems at the same time:


1.Data leakage: account information, bids, contracts and much more commercial confidentiality data can easily be downloaded onto any removable media devices- from a memory stick to ipod . And once it leaves your computer, the integrity of that sensitive data is at risk.

2.Virus infection: more and more viruses and trojans infect computer via USB storage devices, once an infected USB drives is plugged into computer,the worms in it will spread through the whole system.


Most of major antivirus products such as Kaspersky,Bitdefender can do little about this new type of usb virus.


Key Features


Get control over the use of all USB storage devices

You can set the USB drive status to Read only or Readable/Writable both on the machine, also you can disable usage of any usb storage devices to prevent data leaks across USB flash drives. more information


100% protection against any virus via USB drives

USB Virus Scan uses innovative technology to block any threats via USB drive,any USB drives inserted into computer, USB Virus Scan will automatically scan it and remove threats. There are relatively few products available in shops or on the Internet which can offer even close to 100% protection against any malicious programs via USB drive. The majority of products are unable even to guarantee 60% protection.


Clean USB virus in your infected system

USB Virus Scan can not only block virus spreading thought external removable media, but also has the ability to detect and remove usb virus in your computer. What you need to do is clicking the scan button,and waiting for virus scan to complete.


The best solution to protect offline computer

Other antivirus software should update signature database regularly, and they can not effectively protect offline computer that is not connected to the Internet. When new viruses, worms and other malicious attacks strike, traditional signatures are insufficient. USB Virus Scan uses advanced detection techniques, it doesn’t mainly rely on virus signature, so it can protect offline computer from usb virus effectively without updating frequently.


The world’s fastest and smallest antivirus software

With USB Virus Scan, it’s not necessary to sacrifice speed for detection and scanning. Compare with other antivirus software and you’ll discover that USB Virus Scan installer is just 1 MB. The program utilizes approximately 5 to 8 MB of RAM.


100% compatible with all software

Incompatibility between antivirus programs is an issue. In the vast majority of cases, installing two antivirus programs from different vendors on one machine (for increased protection) is technically impossible, as the two programs will disrupt each other’s functioning. However, USB Virus Scan is 100% compatible with all other security products in fully testing, including Norton,Nod32,Bitdefender,Kaspersky,etc.


Easy to use

USB Virus Scan has been specifically designed to perform effectively regardless of the user’s level of computer expertise. Just install and forget it.


Support all kinds of external removable media

• Pen Drives

• USB Cameras

• USB Flash cards

• USB MP3 players

• USB Audio players

• External hard drives

• Pocket PCs

• Mobile phones

• iPod’s and iPhone’sv

• Other USB mass storage enabled devices


**  Step-1.ေအာက္က Download Button ကိုႏွိပ္လိုက္ပါ  


**  Step-2. "5sec". ေလာက္ေစာင္႕ေပးပါ။


**  Step-3. "  << SKIP AD >>   ".ကိုႏွိပ္ေပးပါ။


**  Step-4. Download Link က်လာပါလိမ္႕မယ္။


**  အဆင္ေျပပါေစဗ်ာ။


Wednesday, 29 May 2013

USB ေတြကို Format ရေအာင္ခ်ေပးမယ့္ USB Flash Drive Force Format Tool

Unknown | 29.5.13 | | Best Blogger Tips


ဒီေကာင္ေလးက
ေတာ္ေတာ္ေကာင္းတာဗ်ဳိ႕.. ခုပဲ တစ္ခု စမ္းလိုက္တာ.. အဆင္ေျပတယ္.. ဒါေၾကာင့္
တင္ေပးလိုက္ပါတာပါ.. ဒီေကာင္ကို Run လိုက္.. Drive ဆိုတဲ့ေနရာမွာ ကိုယ့္
USB Driver ကိုေရြး.. Start ကိုႏွိပ္.. Quick ကိုေရြးလို႔လဲရတာေပါ့ဗ်ာ.. ကဲ
အဆင္ေျပၿပီမဟုတ္လား.. Install လုပ္စရာေတာင္ မလိုဘူး.. ဖိုင္ဆိုဒ္ကလည္း
29.9 KB ပဲရွိတယ္..


အဆင္ေျပပါေစ..


Download : 


Thursday, 11 April 2013

USB Stick, Memory Card ထဲက မွားျပီး Format ခ်မိတဲ႔ Data ေတြကို ျပန္ယူခ်င္ရင္ (Unformat 2.5.3.21)

Unknown | 11.4.13 | | | Best Blogger Tips


LSoft Active@ Unformat 2.5.3.21


USB Stick, Memory Card ထဲက မွားျပီး Format ခ်မိတဲ႔ Data ေတြကို ျပန္ယူႏိုင္ပါတယ္.. Serial Key ေတြ Crack ေတြထည့္ေနရတာ အဆင္မေျပျဖစ္မွာစိုးလို႔ Double Click >> Run လိုက္တာနဲ႔ အဆင္ေျပေစမဲ့ Portable Version ကိုတင္ေပးလိုက္ပါတယ္....။


USB Stick နဲ႔ Memory Card ေတြတင္မကပါဘူး .... ဒီ smart phones, MP3
Players, etc. ( including Secure Digital Card, Compact Flash Card,
Memory Stick, MicroDrive, xD Picture Card, SmartMedia Card, Multi-Media
Card, SDHC, Mini SD, Micro SD and more.)
PC hard drives: ATA, SCSI, SATA, SSD and SAS hard drives စ,တဲ႔ Drive ေတြကေန အားလံုး ျပန္ယူႏိုင္ပါတယ္...။


Active@ Unformat is a software utility created to solve almost all data
loss scenarios due to logical failure. It can recover deleted files on a
disk or restore deleted or damaged partitions and volumes. As well as
recovers data after using the FORMAT command.


  • Restores formatted HDD, USB & Flash drives

  • Recovers data from NTFS, FAT32, FAT file systems 

  • Automatic operability for user convenience 

  • Simple and well thought-out interface design
    Supports all Windows operating systems


Supported Media:


  • USB connected disks and flash drives 

  • Memory cards accidently formatted in cameras, smart phones, MP3
    Players, etc. ( including Secure Digital Card, Compact Flash Card,
    Memory Stick, MicroDrive, xD Picture Card, SmartMedia Card, Multi-Media
    Card, SDHC, Mini SD, Micro SD and more.)
    PC hard drives: ATA, SCSI, SATA, SSD and SAS hard drives


UNFORMAT 2.5 New!


  • Support for large HDDs; 

  • Advanced recovery by folder/by file; 

  • Improvements in scan algorithms.


UNFORMAT Professional 2.5 New!


  • Includes Boot Disk Lite (bootable ISO based on Windows PE 3.1) 

  • Windows Bootable Disk Creator (Allows to create bootable disks in different format - CD/DVD/Blu-ray, USB-flash)


Supported Operating Systems: Win2000/2003/XP/Vista/2008 Server/Windows 7/Windows 8 Beta.


Click Here to Download


Saturday, 6 April 2013

Memory Stick မွာ Virus ကုိက္လုိ႕ ေပ်ာက္ေနတဲ့ File ေတြကုိ ဘယ္လုိ ျပန္ေဖာ္မလဲ

Unknown | 6.4.13 | | Best Blogger Tips


 မိမြန္: Memory Stick မွာ Virus ထိပီး ဖိုင္ေတြ တစစီ ပ်က္စီးသြားလို႔ ကူညီၾကပါ ..


ကဲ..သူငယ္ခ်င္းတုိ႕………….


ဒီတစ္ခါ ကၽြန္ေတာ္
တင္ေပးလုိက္တာက…တစ္ခါတစ္ေလ memory stick ေတြမွာ virus ကုိက္လုိ႕  folder ေတြ လံုး၀ေပ်ာက္ေနတာကုိ ၿပန္ေဖာ္တဲ့ နညး္ေလးပါ။။။။
သိၿပီးသားလူေတြလညး္ ရွိမွာပါ..ဒါေပမယ့္ မသိေသးတဲ့ ေဘာ္ေဘာ္ေတြ အတြက္ ရည္ရြယ္ၿပီး တင္ေပးလုိက္တာၿဖစ္ပါတယ္…


….အားလံုး
အဆင္ေၿပပါေစဗ်ာ…..:)


ပထမဆံုးအေနနဲ႕
memory stick ကုိ ကြန္ပ်ဴတာနဲ႕ ဆက္လုိက္ပါ… ဒီေနရာမွာ တစ္ခု သတိထားရမွာက အဲဒီ
stick ကုိ ဖြင့္တဲ့ အခါ My Computer ကို double click နဲ႕ မဖြင့္ဘဲ right click –
Open နဲ႕ပဲ ဖြင့္ပါ။ ဘာလုိ႕လဲ ဆုိေတာ့ ပုိၿပီး လံုၿခံဳ ေအာင္အတြက္ပါ။ ေအာက္မွာ ၿပထားပါတယ္…


ၿပီးရင္ အဲဒီမွာ
Organize ဆုိတဲ့ ထဲကုိ ၀င္လုိက္ပါ..ေအာက္မွာၿပထားပါတယ္….


ၿပီးရင္ အဲဒီထဲကပဲ
Folder and search options ကုိ တစ္ခ်က္ႏွိပ္လုိက္ပါ….


အဲဒါကို တစ္ခ်က္ႏွိပ္လုိက္တာနဲ႕
Folder Options ဆုိတဲ့ box ေလးတစ္ခု က်လာလိမ့္မယ္….ေအာက္မွာ ၿပထားပါတယ္….အဲဒီထဲက
view ဆုိတာကုိ တစ္ခ်က္ႏွိပ္လုိက္ပါ…..


ၿပီးရင္
show hidden files,…..ဆုိဒါကုိ တစ္ခ်က္ႏွိပ္လိုက္ပါ …ဒီပံုမွာကေတာ့ ကၽြန္ေတာ္လုပ္ထားၿပီးသားမုိ႕လုိ႕
အဲဒီ အတုိင္းၿမင္ေနရပါလိမ့္မယ္……


ၿပီးရင္ ေအာက္က
Hide extensions for ….. ဆုိတဲ့စာေၾကာင္းေလးနဲ႕ Hide protect Opera….. ဆုိတာေလးက
tick ေလးကုိ ၿဖဳတ္ေပးလိုက္ပါ………….


အဲဒါဆုိရင္
ဒီbox ေလးက်လာပါလိမ့္မယ္။ Yes လုပ္ၿပီး OK လုပ္လုိက္ပါ။။။။


ကဲ ပထမ တစ္ဆင့္ေတာ့
ၿပီးသြားၿပီ………….


ဇာတ္လမး္က
ခုမွ စမွာ……ကဲ


ၿပီးတာနဲ႕
Run box ကုိ ဖြင့္လုိက္ပါ။( Window key + R ကုိတြဲႏွိပ္လုိက္ပါ။) ၿပီးရင္ အဲဒီမွာ
cmd ဆုိၿပီး ရုိက္ထည့္ ၿပီးရင္ Enter ေခါက္လုိက္ပါ။ cmd box ေလး က်လာပါလိမ့္မယ္။ ေအာက္မွာ
ၿပထားပါတယ္….


ၿပီးရင္ အဲဒီမွာ
ကုိယ့္ memory stick ကုိ ရုိက္ထည့္လုိက္ပါ။ (ဥပမာ---F: , G: , D: , …. ) ကၽြန္ေတာ္က
ေတာ့ ကၽြန္ေတာ့ stick က G: မုိ႕လုိ႕ G: လုိ႕ ရုိက္ထည့္ထားပါတယ္။ ၿပီးရင္ Enter ေခါက္လုိက္ပါ။
ေအာက္ပါ အတုိင္း location က မိမိ stick ရဲ႕ ေနရာကုိညႊန္ၿပေနပါလိမ့္မယ္….


အဲဒီခါက်ရင္…..attrib (folder နာမည္)
–s –h
ဆုိ ၿပီးရုိက္ထည့္ ၿပီးရင္ Enter ေခါက္လုိက္ပါ။ အကယ္
ဒီေနရာမွာ မိမိ folder ရဲ႕ name မွာ
space ၿခားတာတုိ႕ ပါေန ရင္ attrib “romantic hacker” –s –h ဆုိၿပီးေရးရပါမယ္။ ေအာက္မွာ ၿပထားပါတယ္….


အဲဒါဆုိရင္
အဲဒီ memory stick ထဲကေပ်ာက္ေနတဲ့ folder ၿပန္ေပၚလာတာကုိ ေတြ႕ရပါလိမ့္မယ္….


အားလံုး အဆင္ေၿပပါေစ….


Credit to :  http://romantichacker.blogspot.com/2012/09/memory-stick-virus-file.html


 xxxxxxxxxxxxxxxxxxxxxxxxxxxxxxxxxxxxxxxxxxx


အဆင္မေျပေသးရင္ ေအာက္မွာ ဆက္လက္ေလ့လာႏိုင္ပါတယ္...။


 Whenever you plug a USB drive in your system, a window will appear similar to the one shown below
USB....

Don’t click on Ok , just choose ‘Cancel’.

Open the Command Prompt by typing ‘cmd‘ in the run box.
In the command prompt  type the

drive letter:( ex - i,j,k..) and press enter .
Now type dir /w/a and press enter.

This will display a list of the files in the pen drive. Check whether the following files are there or not

    * Autorun.inf
    * Ravmon.exe
    * New Folder.exe
    * svchost.exe
    * Heap41a
    * or any other exe file which may be suspicious.

If any of the above files are there, then probably the USB drive is infected.
In command prompt type attrib -r -a -s -h *.* and press enter.

This will remove the Read Only, Archive, System and hidden file attribute from all the files.
 Now just delete the files using the command
del filename. example del Ravmon.exe.
Delete all the files that are suspicious.

To be on a safer side, just scan the USB drive with an
anti virus program to check whether it is free of virus or not...


 Credit to: http://trick2everyone.blogspot.com

Friday, 5 April 2013

Write Protected Remover & Repair (USB,Memory Card ေတြမွာ Write Protected ျဖစ္ေနရင္)

Unknown | 5.4.13 | | Best Blogger Tips


 ေစာေစာက ဒီေနရာမွာ USB Format Tool ေလးတစ္ခုတင္ေပးလိုက္တာ ေအာက္က Comment မွာ သူ႕ရဲ႕ USB ကို အဲ့ဒါနဲ႔ Format ခ်မရေၾကာင္း အဆင္မေျပေၾကာင္း ေျပာလာလို႔ ေနာက္တစ္မ်ိဳးထပ္တင္ေပးလိုက္ပါတယ္...။


USB,Memory Card ေတြမွာ Write Protected  ျဖစ္ေနျပီး Format ခ်လည္းမရ ဖိုင္လ္ေတြ Data ေတြလည္း ကူးမရ ေရႊ႕မရျဖစ္ေနရင္ ေအာက္မွာတင္ေပးထားတဲ႔ Software ေလးကို ေဒါင္းယူပါ rar ဖိုင္လ္ ကိုျဖည္ျပီး (Write Protected ျဖစ္ေနတဲ႔ USB,Memory Card ကို ကြန္ပ်ဴတာမွာ အရင္တပ္ထားပါ)


Formatter.exe ေလးကို ႏွိပ္ျပီး Format ခ်ေပးႏိုင္ပါတယ္...။


A
few days ago I bought a new thumbdrive. Then, it becomes write
protected. I cannot format the drive, drive is write protected. Also, I’m not
able to delete any files and folder on the drive and also not able to copy new
files and folder to my thumbdrive. So, simply download and give a try to download
the write-protected remover from the link below if you having trouble like
me. Trust me….SOLVED!


Click Here to Download USB Formatter


Click Here to Download USB Repair


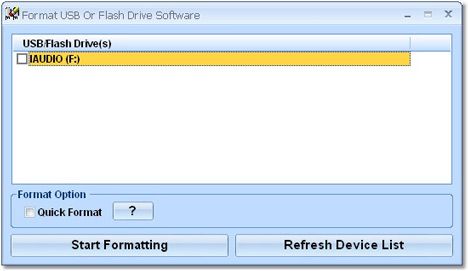
Format ခ်မရတဲ႔ USB,Flash Drive ေတြကို အလြယ္တကူ Format ခ်ေပးမဲ့ Software

Unknown | 5.4.13 | Best Blogger Tips


Format ခ်မရတဲ႔ USB,Flash Drive ေတြကို အလြယ္တကူ Format ခ်ေပးမဲ့ Software ေလးပါ... အရင္ကတင္ေပးထားတာ Link အလုပ္မလုပ္ေတာ့ဘူးေျပာလာလို႔ ျပန္တင္ေပးလိုက္ပါတယ္...။


This software offers a solution for users who want to format
multiple USB or flash drives quickly. The software automatically detects
the current drives on the system and the user simply selects those for
formatting. There is a check box to allow 'Quick Format'. With this easy
to use software, formatting any number of drives takes just one click.


Click Here to Download Setup


Click Here to Download Patch


Friday, 25 January 2013

How To Repair Memory Card (Memory Card ေတြကို Cumputer ကမဖတ္ရင္/မသိရင္)

Unknown | 25.1.13 | | Best Blogger Tips


format corrupted memory card


Memory Card ေတြကို Cumputer ကမဖတ္ေတာ့ရင္/မသိရင္ ဒီ Software ေလးနဲ႔ Repair လုပ္ေပးႏိုင္ပါတယ္....:)


MultiMediaCards (MMCs) used for mobile phones are prone to memory corruption errors due to improper usage or mishandling. However these problems can often be solved with a simple reformat of your MMC.


MMC Medic is a free desktop application that reformats your corrupted MMC so that you can use it again. Do take note though that reformatting your MMC deletes all of its contents.


repair your MMC, put it in a card reader and insert it in your computer. Then run MMC Medic and enter the capacity of your MMC and the drive letter where you placed your card reader. You can also input your MMC’s volume label. Once you are set, click “Format MMC“ to start repairing it.


MMC Medic is a great tool that can help people with lots of mobile devices while removing the hassle of corrupted external storage.


Click Here to Download


Tuesday, 22 January 2013

OdinShare.Odin.U.Disk.Encrypt.Creator.v8.7.5 Only 2MB (Hard Drive,USB ေတြကို Password ေပးျပီး Lock ခ်ထားခ်င္ရင္)

Unknown | 22.1.13 | | Best Blogger Tips


ဒီ Software ေလးက disk/Flash drive/Portable Hard Drive/Mobile Hard Drive စ,တာေတြကို Password ေပးျပီး Lock ခ်ေပးႏိုင္တဲ႔ Software ေလးပါ... လိုအပ္ၾကမယ္ထင္ပါတယ္....:)


Keep your pendrive password protect by 2mb software.


Description: Odin U Disk Encrypt Creator is a very useful U disk/Flash drive encryption tool. Its friendly interface guides you encrypt your U disk/Flash drive/Portable Hard Drive/Mobile Hard Drive easily.Odin U Disk Encrypt Creator encrypt/protect the external drives with the strong password to ensure absolute confidentiality of your data. After you encrypted your u disk/flash drive with Odin U Disk Encryption Creator,No one can open the files and documents located on your USB storage device except you.Spotlight:The drives protected with Odin U disk Encrypt Creator can be used with other Windows computers, without needing to install Odin U Disk Encrypt Creator on the computer.And protect your data even if your computer has been infected by virus.


Thursday, 17 January 2013

Virus ေၾကာင္႔ ေပ်ာက္ေနတဲ့ USB, Memory Card ထဲက ဖိုင္ေတြ ျပန္ရွာမယ္ (USB Show)

Unknown | 17.1.13 | | | Best Blogger Tips


အေၾကာင္း အမ်ဳိးမ်ဳိးေၾကာင့္ ကိုယ့္ရဲ႕ USB Memory Card ေလး ထဲကို Virus ဝင္သြားၿပီး


အထဲမွာရွိတဲ့ အခ်က္အလက္ေတြ ရွာမေတြ႔ေတာ့ဘူး ဆုိရင္ စိတ္ပ်က္မသြားပါနဲ႔။ USB Show ဆုိတဲ့ ေဆာ့ဖ္ဝဲေလးက ကူညီ ေျဖရွင္း ေပးပါလိမ့္မယ္။ ဒီေဆာ့ဖ္ဝဲ ေလးရဲ႕အကူအညီနဲ႔ ကိုယ့္ရဲ႕ေပ်ာက္ကြယ္ ေနတဲ့ ေဒတာ အခ်က္အလက္ေတြကို ျပန္ ေဖာ္ထုတ္ေပးႏုိင္မွာ ျဖစ္ပါတယ္။ ဒီေဆာ့ဖ္ဝဲေလးဟာ ဆုိရင္ 190 KB သာရွိလုိ႔ အလြန္ ေပါ့ပါးေသး ငယ္ၿပီး သူ႔ကို အသံုးျပဳဖို႔အတြက္ Install လုပ္ေပးစရာလည္း လုိမွာမဟုတ္ ပါဘူး။ ေဆာ့ဖ္ဝဲကို ဖြင့္လိုက္ၿပီးတာနဲ႔ Remover hide files ဆုိတဲ့ေနရာေလး ကို ႏွိပ္လုိက္ၿပီး ကြန္ပ်ဴတာထဲမွာရွိတဲ့ မိမိရဲ႕ USB Device ကိုညႊန္ေပးလုိက္ တာနဲ႔ Virus က ဝွက္ထားတဲ့ဖိုင္ေတြ ကို အလုိအေလ်ာက္ ေဖာ္ထုတ္ ေပးသြား မွာပါ။ ၿပီးသြားရင္ေတာ့ USB, Memory Card ကို ကြန္ပ်ဴတာမွာသြားၾကည့္လုိက္ ရင္ ေပ်ာက္သြားတဲ့ဖုိင္ေတြ အကုန္ျပန္ ေပၚလာတာ ေတြ႔ရပါလိမ့္မယ္။ USB Show ေဆာ့ဖ္ဝဲေလးကို အသံုးျပဳခ်င္ တယ္ဆုိရင္ေတာ့ ေအာက္က Link မွတဆင့္Download  ျပဳလုပ္ၿပီး ရယူသံုးစြဲႏုိင္ပါတယ္။


A simple tool that will recover hidden files from any USB device


Some malware infections may cause important system files to become hidden or altogether erased and to restore them not seldom re-installing the operating system is the only option. In case you want to try something else before obliterating all data from your HDD, USB Show is a ready to help.


This is a lightweight but very efficient application that will help you recover the files hidden by various viruses, be they aimed at flash drive memory devices or hard disks.


Although called USB Show, the program can work with hard disks as well, but note that the scanning process will take a lot of time, especially when dealing with very large devices.


This application is based on a one-click recovery process, so the interface is extremely user friendly. There's only one button you can press, the one that starts the scan, but you are also prompted to choose the drive you wish to analyze.


The great thing about USB Show is that it is able to use any removable storage device when operating. However, just to stay on the safe side, it's better to make a backup before using this program because it may also recover some malicious files as well.


Plus, it's better to keep the antivirus always up and running, again to make sure you won't get assaulted by dangerous content as soon as the software works its magic.


All in all, USB Show might come in handy to a number of users, especially since the operation is as easy as it can be.


Saturday, 12 January 2013

Kingston Format Utility v1.0.3.0 (USB Drives ေတြ Format ခ်မရရင္)

Unknown | 12.1.13 | | Best Blogger Tips


USB Drives ေတြ Format ခ်မရရင္ စမ္းၾကည့္ႏိုင္ဖို႔ တင္ေပးလိုက္ပါတယ္....:)


Description:


Kingston USB drives are pre-formatted with a FAT32 file system for cross platform compatibility and for optimum performance. Formatting this drive with Windows, Mac or Linux may cause a performance decrease.


The solution to obtain the best possible performance is to format the drive with the Kingston utility located below.


Note: ALL DATA WILL BE ERASED. Please back up the data stored on the Hyper X drive before using the Kingston Format Utility.


Supported Operating Systems:


Windows 7 (SP1), Vista (SP1, SP2) and Windows XP (SP2, SP3)


Click Here to Download Kingston USB Drives


How To Hack Window Admin Password ? (Window Admin Password ေမ့သြားရင္)

Unknown | 12.1.13 | | | Best Blogger Tips


Window Login Password (Admin Password) ေမ့သြားရင္ 


ပထမဆံုး  ဒါေလးကို  USB ထဲကို ဘမ္းပါ. ကြန္ျပဴတာကို Restart ခ်ျပီး..F2 , F12 တခုခုကေန BIOS ကိုဝင္ျပီး 1st Boot မွာ USB ကိုထားျပီး Boot တတ္ေပးလိုက္ပါ.... အဆင္ေျပၾကပါေစ.....


အဆင္မေျပေသးဘူးဆိုရင္ ဒီ Kno Boot v2.0 နဲ႔ Window Admin Password ကို Reset လုပ္ေပးႏိုင္ပါတယ္... Software ေလးက 16KB ပဲရွိပါတယ္....


 ေအာက္မွာတင္ေပးထားတဲ႔ Kon-boot USB ကို ေဒါင္းယူပါ ... 


 USB ကို  FAT32 နဲ႔ Format ခ်ပါ....


USB_INSTALL.vbs ကို Double Click နဲ႔ Run ေပးလိုက္ပါ...Kno Boot ဟာ  Automatically USB ထဲကိုေရာက္သြားပါလိမ့္မယ္...


(သို႔မဟုတ္)


konboot_usb.exe  ကို Double Click နဲ႔ Run လိုက္ပါ... Command Prompt တတ္လာရင္ မိမိရဲ႕ USB ရဲ႕နာမည္ (ဥပမာ: G: H: J:) ကိုေရးထည့္ျပီး Enter ေခါက္ပါ... Kno Boot ဟာ  Automatically USB ထဲကိုေရာက္သြားပါလိမ့္မယ္... 


 ကြန္ျပဴတာကို Restart ခ်..  F2 , F12  တခုခုကေန BIOS Menu ကိုဝင္ 1st Boot မွာ USB ကိုထားျပီး Boot တတ္ေပးလိုက္ပါ.... Kno boot က အလိုေလွ်ာက္ Window Admin Password ကို ဖ်က္ေပးသြားပါလိမ့္မယ္.... အဆင္ေျပၾကပါေစ.....


Kon Boot New v2.0 Commercial Edition [Bypass Windows Login Passwords]


Kon-Boot for Windows enables logging in to any password protected machine profile without without any knowledge of the password. This tool changes the contents of Windows kernel while booting, everything is done virtually – without any interferences with physical system changes. So far following systems were tested to work correctly with Kon-Boot:


Microsoft Windows XP Home Edition (Service Pack 2+)


Microsoft Windows Vista Home Basic (32/64 bit)


Microsoft Windows Vista Home Premium (32/64 bit)


Microsoft Windows Vista Business (32/64 bit)


Microsoft Windows Vista Enterprise (32/64 bit)


Microsoft Windows 7 Home Premium (32/64 Bit)


Microsoft Windows 7 Professional (32/64 Bit)


Microsoft Windows 7 Ultimate (32/64 Bit)


Microsoft Windows Server 2003 Standard (32/64bit)


Microsoft Windows Server 2003 Datacenter (32/64bit)


Microsoft Windows Server 2003 Enterprise (32/64bit)


Microsoft Windows Server 2003 Web Edition (32/64bit)


Microsoft Windows Server 2008 Standard (32/64bit)


Microsoft Windows Server 2008 Datacenter (32/64bit)


Microsoft Windows Server 2008 Enterprise (32/64bit)


Follow the steps below :


1. First of all download kon-boot .


2. Plug-In you USB into your computer and format it to FAT32.


3. Open the download RAR file and extract it and go to the folder named "KonBoot USB".


4. Now double click on "KonBootInstall.exe".


5. A command prompt will be prompted and ask you to enter your USB drive latter in my case it is H: enter you USB drive later and press enter. It will be installed automatically on you thumb drive.


6. Now you're done to test it restart your computer and enter your BIOS or Bootload selecter (on my Dell desktop I just simply hit F12 as soon as my PC turns on and I can select which device I want to boot from). Keep in mind that the device you want to boot from is the USB.


7. Now boot into kon-boot and VOILA you can enter your copy of windows without entering any password . 


Click Here to Download Kno Boot USB v2.0


Monday, 7 January 2013

Format ခ်မရတဲ႔ USB Stick ေတြကိုျပင္ၾကည့္ရေအာင္ (Repairing Memory Stick)

Unknown | 7.1.13 | | Best Blogger Tips


Repair a USB Flash Drive


Memory Stick ေတြ လူသံုးမ်ားသလိုပဲ အပ်က္လည္း မ်ားလွပါတယ္။ ကြန္ပ်ဴတာက မသိေတာ့တာ၊ Format ခ်ခိုင္းတာ၊ ဖိုင္ေတြ ထပ္ထည့္လို႔မရေတာ့တာ၊ Capacity အျပည့္မရေတာ့တာ စသည္ျဖင့္ ျပႆနာေတြက စံုလွပါတယ္။ အခုေတာ့ Format ခ်ခိုင္းတယ္၊ ဒါေပမဲ့ Format ခ်မရတဲ့ Memory Stick တစ္ေခ်ာင္းကို ျပဳျပင္နည္းေလးကို ေရးသားေပးလိုက္ပါတယ္။


သေဘာတရားကေတာ့ Format ခ်ခိုင္းတယ္ဆိုတာက တနည္းအားျဖင့္ File System မရွိလို႔ပါပဲ။ Format ခ်လည္း မရတာကေတာ့ Partition Table က Corrupt ျဖစ္လို႔ပါ။ အဲဒါေၾကာင့္ Partition Table ဖ်က္ၿပီး အသစ္ျပန္ေဆာက္၊ ၿပီးေတာ့ File System ျပန္သတ္မွတ္လိုက္ရင္ ျပန္ေကာင္းသြားပါလိမ့္မယ္။ လိုအပ္တဲ့ Software ကေတာ့ ႏွစ္ခုတည္းပါ။Test Disk ရယ္ Bootice ရယ္ပါ။
ပထမဆံုး Test Disk ကို Run ပါ။ 


No Log ကို Keyboard က Arrow Key နဲ႔ ေရြးၿပီး Enter ေခါက္ပါ။ အဲဒီအခါမွာ Hard Disk နဲ႔ Memory Stick ရယ္ ေပၚလာပါလိမ့္မယ္။ Memory Stick ကို ေရြးပါ။ Enter ေခါက္ပါ။ ေနာက္ထပ္ သူက Partition Table type ကို ေရြးခိုင္းပါလိမ့္မယ္။ Intel ကို ေရြးၿပီး Enter ေခါက္ပါ။ အဲဒီအခါမွာ [Analyse] [Advanced] [Geometry] စသည္ျဖင့္ ေရြးခ်ယ္စရာေတြ ေပၚလာပါလိမ့္မယ္။ အဲဒီထဲက [Delete] ကို ေရြးၿပီး Enter ေခါက္ပါ။ Yes/No ေမးရင္ Y ကို ႏွိပ္ၿပီး Enter ေခါက္ပါ။ ဒါဆိုရင္ Memory Stick ရဲ႕ Partition Table ကို ဖ်က္ၿပီး သြားပါၿပီ။


ဒီထိဆိုရင္ TestDisk ရဲ႕အပိုင္း ၿပီးသြားပါၿပီ။ ေနာက္ထပ္ Bootice ကို Run ပါ။


Perform Format ကို ႏွိပ္ပါ။ ေနာက္တစ္ဆင့္ ေပၚလာရင္ USB-HDD mode (Single Partition) ကို ေရြးပါ။ Next ကို ႏွိပ္ပါ။ Dialog box ေပၚလာရင္ OK ႏွိပ္ပါ။ ဒါဆိုရင္ Format စရိုက္ပါလိမ့္မယ္။ 


ရပါၿပီ။ စာဖတ္သူရဲ႕ Stick အပ်က္ကေလး ျပန္ေကာင္းသြားပါလိမ့္မယ္။


Credit To: http://aunglay17.multiply.com


Click Here to Download Bootice (100KB)


Click Here to Download TestDisk (1.44MB)


xxxxxxxxxxxxxxxxxxxxxxxxxxxxxxxxxxxxxxxxxxxxxxxxxxxxxxxxxxxxxxxxxxxxxxxxxx


USB Format ခ်မရရင္ေအာက္ကနည္းလမ္းတိုင္းစမ္းၾကည့္ႏိုင္ပါေသးတယ္...


Scanning for Problems (Windows)


1. Insert the drive into the USB port on the    computer.


2. Open My Computer and right click on the      Removable Disk Icon. Choose the Properties     option.


3. Click on the Tools tab.


4. Click on the Check Now button.


5. Click on both “Automatically fix file system         errors”   and “Scan for and attempt recovery of       bad   sectors” check boxes. Click Start.


6. Wait for the scan to complete. Click Close when       finished.


Now Reformatting the Drive


1. Format with NTFS instead of FAT32.


2. After this, format again with FAT32.


Credit To: http://www.wikihow.com


သို႔မဟုတ္ ဒီ Tools ေလးနဲ႔ Format ခ်ၾကည့္ႏိုင္ပါတယ္...


Kingston USB drives are pre-formatted with a FAT32 file system for cross platform compatibility and for optimum performance. Formatting this drive with Windows, Mac or Linux may cause a performance decrease.


The solution to obtain the best possible performance is to format the drive with the Kingston utility located below.


Note: ALL DATA WILL BE ERASED. Please back up the data stored on the Hyper X drive before using the Kingston Format Utility.


Supported Operating Systems:


Windows 7 (SP1), Vista (SP1, SP2) and Windows XP (SP2, SP3)


Click Here to Download Kingston USB Drives


Thursday, 3 January 2013

USB Disk Security 6.2.0.30 Datecode 02.01.2013

Unknown | 3.1.13 | | Best Blogger Tips


USB Disk Security 6.2.24 Full Version Cracked Download With License Keys-iGAWAR


USB Disk Security ကိုအားလံုးသိၾကမွာပါေနာ္.... 2013 ရဲ႕ Update ေလးမို႔ ထပ္တင္ေပးလိုက္ပါတယ္.... 


USB Disk Security provides 100% protection against any threats via USB drive, however, the majority of other products are unable even to guarantee 90% protection. USB Disk Security is the best antivirus software to permanently protect offline computer without the need for signature updates, but other antivirus software should update signature database regularly, and they cannot effectively protect offline computer. This light and easy to use solution is 100% compatible with all software and doesn't slow down your computer at all. You pay USB Disk Security once and get it all, however, other antivirus products should be paid for updates every year.


Wednesday, 10 October 2012

USB Memory Stick ကို Format ခ်မရရင္

Unknown | 10.10.12 | | | Best Blogger Tips


format usb drive


တစ္ခါတစ္ေလ
ကိုယ္သံုးေနတဲ႔ USB,Memory Card  ေလးေတက အေၾကာင္းအမ်ိဳးမ်ိဳးေၾကာင္႔ ဖိုင္လ္ေတြ ထပ္ထည္႔လို႔
မရေတာ႔တာမ်ိဳး၊ ထုတ္လို႔ မရေတာ႔တာမ်ိဳး၊ Format ခ်မရတာမ်ိဳး ျဖစ္တတ္ပါတယ္။ အဲဒီလို ျပႆနာမ်ိဳး ၾကံဳလာခဲ့ရင္ ဒီနည္းလမ္းအတိုင္း ေျဖရွင္းေပးႏိုင္ပါတယ္...။


USB Memory Stick ကို ကြန္ျပဴတာမွာ တပ္ထားပါ...။


 Start > Search box ထဲမွာ   devmgmt.msc  ေရးျပီး  Enter ေခါက္ပါ...


 Disk Drives ဆိုတာေလးကို ကလစ္လိုက္ပါ  အဲဒီမွာ ကိုယ္႔ရဲ႕ USB Drive ကို ေတြ႔ပါလိမ္႔မယ္။


 USB Device ကို Double Click (or) Right Click  ေထာက္ Propereties ကိုႏွိပ္ပါ။ ေနာက္ထပ္ Box ေလးပြင့္လာရင္ အေပၚက MenuTab မွာ
Policies ကိုႏွိပ္ျပီး 
"Optimize for performance" ကို ေရြးေပးလိုက္ပါ။ Window 7 မွာေတာ့ (Better
performance”
) လို႔ေပၚပါတယ္..။


အားလံုးျပီးရင္ My Computer ကို ျပန္သြားျပီး USB Drive ေပၚကို Right click Format ခ်ၾကည္႔ပါ။ Format ခ်တဲ႔ ေနရာမွာ File System ကိုၾကည္႔လိုက္ရင္ NTFS Format Option ကို ေတြ႔ရပါလိမ္႔မယ္။


 USB drive ကို NTFS နဲ႔ Format ခ်လို႔ရပါျပီ...။


တျခား ျဖစ္တတ္တဲ႔ USB,Memory Card Write Protect  ျပႆနာ ေျဖရွင္းနည္းေတြကို  ဒီေနရာ  နဲ႔  ဒီေနရာ  မွာ ဆက္လက္ေလ့လာႏိုင္ပါတယ္..။


အားလံုးအဆင္ေျပၾကပါေစ...


ဝင္းကမာၻေက်ာ္