Monday, 29 October 2012

Digital Life Journal အတြဲ-၁၊ အမွတ္-၂၆

Unknown | 29.10.12 | Best Blogger Tips


အပတ္စဥ္ တင္ဆက္ေပးေနက်ျဖစ္ေသာ Digital Life Journal အတြဲ-၁၊ အမွတ္-၂၆ ကို Download ရယူႏိုင္ပါၿပီ။


အင္တာနက္ Connection ကို 200% ထိ ျမင့္တင္ေပးမဲ႔ Internet turbo 2012

Unknown | 29.10.12 | | | Best Blogger Tips


You can boost your Internet connection performances up to 200% and even more !!!


Internet connection ကိုျမွင့္တင္ေပးတဲ႔ Freeware ေလးပါ အရင္ကလည္းတင္းေပးဖူးပါတယ္... ဒါကေနာက္ဆံုး Update ပါ....


Size, OS :       800 KB   |   Windows System
Last Updated: February 01, 2012, Wednesday
Software ID:   86387   |   Use this software ID to contact us


Internet Turbo 2012 - Instant connectivity booster, speed up and optimize your internet connection

iNTERNET Turbo 2012 easily solves two of the most well-known
Internet problems: slow connection performances and undesirable
disconnections. iNTERNET Turbo 2012 can prevent TCP/IP protocols data
transfer from fragmentation. By using it you can boost your Internet
connection performances up to 200% and even more.

iNTERNET Turbo 2012
saves you time, money and unwanted frustrations. It's a must have tool
for anyone who uses an Internet connection and hates having to deal with
slow connections and endless buffering. With iNTERNET Turbo 2012 you
can boost any Internet related software activities such as web browsing,
downloading files, watching videos, files streaming and sharing and
many more. Moreover it also prevents an undesirable disconnection


Windows Vista Service Pack 2 FINAL x86/x64 & Loader

Unknown | 29.10.12 | Best Blogger Tips


Window Vista Ultimate Service Pack-2 နဲ႔ Loader ေလးလုိခ်င္ပါတယ္၊ေက်းဇူးျပဳျပီးကူညီပါအုံး....


*System Requirements :


  • CPU : 1 Ghz

  • RAM : 1 Gb

  • HDD : 15 Gb

  • VGA Memory : 128 Mb


Sunday, 28 October 2012

"SHIFT + DELETE" နဲ႔ မွားဖ်က္မိတဲ့ Files ေတြ Recovery လုပ္ယူနည္း (eSupport Undelete Plus 3.0.3 Build 521)

Unknown | 28.10.12 | | | Best Blogger Tips


"SHIFT + DELETE" နဲ႔ မွားဖ်က္မိတဲ့ Documents, Photos, Video, Music ,Email   ေတြကို ျပန္ယူႏိုင္ေပးႏိုင္ပါတဲ့အျပင္ Recycle Bin,Hard Drives, USB Thumb Drives, Camera Media Cards, Floppy Disks စ,တဲ႔ Storage Devices ေတြက မွားဖ်က္မိတာေတြကိုလည္း Recovery လုပ္ေပးႏိုင္ပါတယ္ ..။


 အသံုးျပဳပံုကလည္း အရမ္းလြယ္ပါတယ္ မိမိ Recovery လုပ္ခ်င္တဲ႔  Device ကိုေရြးပါ Start Scan ကို ႏွိပ္ပါ ... Recover လုပ္မဲ႔ Files ကို Select မွတ္ပါ .. Recover File ကိုသိမ္းထားမဲ႔ Folder ကိုေရြးေပးပါ...  ျပီးရင္ Recover File ကို ႏွိပ္ေပးလိုက္ရံုပါပဲ ...။


A quick and effective way to restore deleted or lost files.

It can also recover files that have been emptied from the Recycle Bin, permanently deleted files within Windows using the Shift + Delete, and files that have been deleted from within a Command Prompt.


  1.     Easily recover documents, photos, video, music and email.

  2.     Quickly recover files - even those emptied from the Recycle Bin.

  3.     Recover files after a hard drive partitioning error.

  4.     File recovery after accidental format - even if you have reinstalled Windows.

  5.     Recover files from Hard Drives, USB Thumb Drives, Camera Media Cards, Floppy Disks and other storage devices.


Upload Again (17 Dec 2012 8:34PM)


Saturday, 27 October 2012

SpeedyPC Pro

Unknown | 27.10.12 | Best Blogger Tips


SpeedyPC Pro ကိုေတာင္းထားလို႔ ျပန္လည္မွ်ေဝေပးလိုက္ပါတယ္ ေတာင္းထားတာကေတာ့ Version  3.1.3 ပါ Crack အဆင္မေျပလို႔ Version 3.0.0 ကိုပဲ ျပန္တင္ေပးလိုက္ပါတယ္ .... သူကတာ့ PC ကိုေလးလန္ေစတဲ႔ Registry Error နဲ႔ Malware ေတြကို ျပဳျပင္ရွင္းလင္းေပးတဲ႔ Speed Up ေဆာ့ဖ္ဝဲ တစ္မ်ိဳးပါ.... အေသးစိတ္ကို www.fixpcerrorsquickly.com  မွာေလ့လာႏိုင္ပါတယ္...။


SpeedyPC Pro Can Tackle Your Mysterious Window Problems and Get Your PC Back to Smooth


 Performance.


Here Is How It Can Help PC Users:

Clean your PC of the ActiveX and registry errors and clutter that slow it down.

Protect yourself and your PC by removing malware and privacy files.

Optimize memory by defragging. Improves file save and recall times.

Help opening unknown file extensions with File Manger tool.

Bonus SpeedyPC Pro tools to improve your computer's performance

and Much More


Full Version ျဖစ္ေအာင္ Patch ခ်ိဳးနည္း


AutoDesk AutoCAD 2012 & 2013 Keygen

Unknown | 27.10.12 | Best Blogger Tips


AutoDesk AutoCAD 2013 x32bit ကို ေဒါင္းရတာ အဆင္ေျပမဲ့ Link ေလးေတြ႕လို႔ တခါတည္း  မွ်ေဝေပးလိုက္ပါတယ္...။


32-bit version:
 3.2 GB


 Part 1: CLICK HERE 


 part 2: CLICK HERE 


 Section 3: CLICK HERE 


 Section 4: CLICK HERE 


[ How To Use ]


Install Autodesk Autocad 2012

Use as Serial 666-69696969, 667-98989898, 400-45454545 … or anything matching those templates

Use as Product Key 001D1

Finish the installation & restart Autodesk Product

Before clicking on Activate, You have 2 options (Choose option a or b) :

- a) Disable Your network Card, pull the network cable out or block with firewall

(this is just to disable online serial check)

- b) Click on Activate and it will tell you that your serial is wrong, simply click

on close et click on activate again.

Select I have an activation code from Autodesk

Once at the activation screen : Start XFORCE Keygen 32bits version if
you are installing a 32bits application and 64bits if you are
installing a 64bits application.

Click on Mem Patch (you should see successfully patched)

Copy the request code into the keygen and press generate

Now copy the activation code back to the activation screen and click Next


You have a fully registered autodesk product !


[ Notes ]


Make sure you are running the Keygen as administrator and with UAC off
on Vista or Windows7, but you have to anyway to install Adesk products.


AutoCAD 2012 Keygen X-force [For All The autodesk 2012 Products Activation


2013 Keygen For 64bit


 AutoCad 2012 x32/x64 Keygen


CCleaner 3.25.1872 Full (Update)

Unknown | 27.10.12 | | Best Blogger Tips


ဝင္းကမာၻေက်ာ္


CCleaner ေနာက္ဆံုး Update ေလးပါ...  ကြန္ျပဴတာမွာ တကယ္ေဆာင္ထားသင့္တဲ႔ Software ေလးမို႔ Update ထြက္တိုင္းတင္ေပးေနတာပါ..။


CCleaner is a freeware system optimization, privacy and cleaning tool. It removes unused files from your system – allowing Windows to run faster and freeing up valuable hard disk space. It also cleans traces of your online activities such as your Internet history. Additionally it contains a fully featured registry cleaner. But the best part is that it’s fast (normally taking less than a second to run) and contains NO Spyware or Adware! 


Cleans the following:


  1. Internet Explorer

  2. Firefox

  3. Google Chrome

  4. Opera

  5. Safari

  6. Windows – Recycle Bin, Recent Documents, Temporary files and Log files.

  7. Registry cleaner

  8. Third-party applications


Friday, 26 October 2012

Android ဖုန္းဂိမ္းေတြကို ကြန္ပ်ဴတာမွာေဆာ့ခ်င္ပါတယ္ဆိုတဲ့သူေတြအတြက္။

Unknown | 26.10.12 | | Best Blogger Tips

Android ဖုန္းဂိမ္းေတြကို ကြန္ပ်ဴတာမွာေဆာ့ခ်င္ပါတယ္ဆိုတဲ့သူေတြအတြက္ ဆိုဒ္ေတြမွာေမႊေႏွာက္ၿပီးတင္ေပးလိုက္ပါတယ္။ က်ေနာ္တို႕အေနနဲ႕လည္း အားလံုးကိုအဆင္ေျပေစခ်င္တဲ့ေစတနာနဲ႕ ေတာင္းဆိုသမွ်ကို အခ်ိန္နဲ႕တေျပးညီ တင္ေပးေနပါတယ္။


ဒါေၾကာင့္ မိမိေတာင္းဆိုခဲ့တဲ့ Software မ်ား က်ေနာ္တို႕အေနနဲ႕ ဆိုဒ္မွာမတင္ရေသးဘူးဆိုရင္ စိတ္မပ်က္ၾကပါနဲ႕အားလံုးက တင္ၿပီးေနပါၿပီ. အတည္မျပဳရေသးတဲ့အတြက္ ခ်က္ခ်င္း ဆိုဒ္ေပၚကိုမတင္ေပးႏိုင္တာပါ..ေတာင္းဆိုသမွ်ကို သံုးေလးရက္အတြင္း ဆိုဒ္ေပၚေရာက္ေအာင္ တင္ေပးမွာပါ..အားေပးသူအားလံုးကို အထူးပင္ေက်းဇူးတင္ရွိပါတယ္ခင္ဗ်ာ။ ေအာက္က အေၾကာင္းအရာေတြကေတာ့ Copy ကူထားေပးတာပါ။ မူရင္းကေတာ့ ဒီမွာပါ။


 Android game ေတြကို ကြန္ၿပဴတာ မွာ ေဆာ႔ မယ္


ဒီ နည္းေလ း က ေတာ႕ လြယ္ ကူ ပါတယ္ ။ေဒါင္း ၿပီး ရင္ ရတဲ႕ exe ဖိုင္ ေလး ကို
သြင္းလိုက္ တာ နဲ႔ သင္ဟာ Android ဖုန္း က လိသလို ကလိ လို႕ ရပါ ၿပီ။ Game
သြင္း ဖို႕ ကို ေတာ႔ 91 for android pc suit ေလး နဲ႕ ဆို အားလံုး အိုေခ
သြားပါ ၿပီ ။


How to Run & Play Android Apps & Games on PC


Nowadays, There are so much Android Applications and Games which
available to download and use in the google play. You can easily
download and run them on your Android Gadget. But now, we don't have to
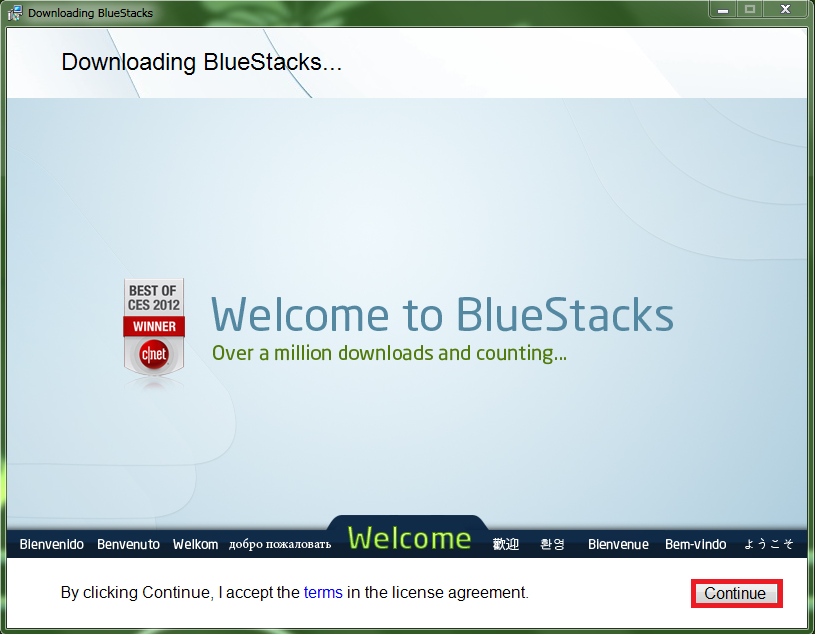
use Android to run or play android apps and games. You can easily run android apps and play android games on your PC or Laptop which using Windows 7 or Mac. You can bring all the android apps and games onto your PC with just one app : Bluestacks.


What is Bluestacks?


Bluestacks is an application for Windows PC which lets you
download and run any android app or game, whether it’s a music app,
social app, news app or any game. It brings the complete android
environment on your PC. You can sync your downloaded apps with the PC
App too.


If you are not satisfied with the available apps and want to try some
apps installed on your Phone, you can transfer using the Cloud Connect
feature. Install the phone app and connect it to Bluestacks. You will
see the transferred apps soon on your PC.
To play games on PC you can use the gadget that appears on desktop. Just
select and click the application you want to play.


Download Bluestacks


You can download Bluestacks application from the official website. 


SuperAntiSpyWare v.5.0.1148 pro FullVersion တင္ေပးလိုက္ပါၿပီ။

Unknown | 26.10.12 | | Best Blogger Tips


 SuperAntiSpyWare v.5.0.1148 pro FullVersion တင္ေပးလိုက္ပါၿပီ။ ေအာက္က အဆင္ေျပတဲ့ Link မွာ Download ယူႏိုင္ပါၿပီခင္ဗ်ာ။


Download ===> Mediafire Link ( mmitd) Mediafire4Shared ၊  ifile


4shared အေကာင့္မရွိသူမ်ားအတြက္

Username : mailserver.npt@gmail.


com

Passwords: 12213456   (အမ်ားသံုးျဖစ္သည့္အတြက္ Passwords ခ်ိန္းမသြားၾကပါရန္ ေမတၱာရပ္ခံပါသည္) 

Viber ကို PC မွာ Install လုပ္ၿပီးသံုးခ်င္တဲ့ သူမ်ားအတြက္။

Unknown | 26.10.12 | Best Blogger Tips


Viber ကို PC မွာ Install လုပ္ခ်င္ပါတယ္ဆိုတဲ့သူေတြအတြက္ ျမန္မာဆိုဒ္ေတြမွာလိုက္ေမႊၿပီး ေကာင္းႏိုးရာရာေတြကို ျပန္လည္တင္ေပးလိုက္ပါတယ္ခင္ဗ်ာ။


အခုကၽြန္ေတာ္တို႕ျမန္မာႏိုင္ငံမွာ ဖုန္းနဲ႕ အင္တာနက္ သံုးခြင္႕ရျပီးေနာက္ပိုင္းမွာ နာမည္


ၾကီးလာတဲ႕ Communication Software တစ္ခုကေတာ႕


Viber ျဖစ္ပါတယ္။ အဲဒါကို ဖုန္းနဲ႕ ေခၚဆုိအသံုး


ျပဳႏိုင္ပါတယ္။ ဖုန္းအခ်င္းခ်င္းကို အင္တာနက္ကြန္နရွင္ရွိယံုျဖင္႕ ဘယ္ႏိုင္ငံကိုမဆို အခမဲ႕ ေခၚဆိုႏိုင္ပါ


တယ္ဗ်ာ။ အခုဆိုရင္ ဖုန္းအခ်င္းခ်င္းသာေခၚဆို အသံုးျပဳႏိုင္တဲ႕ Viber ကို PC နဲ႕ပါ အသံုးျပဳလာႏိုင္ပါျပီ။


Viber ကို PC to PC , PC to Phone , Phone to Phone , Phone to PC အမ်ိဳးမ်ိဳး အဆင္ေျပစြာနဲ႕အ


သံုးျပဳလို႕ရပါျပီ။ အင္တာနက္ကြန္နရွင္ရွိဖို႕နဲ႕ Viber Account ရွိဖို႕ဘဲလိုပါတယ္။ တစ္ခုေတာ႕ ရွိတယ္ဗ်


PC အတြက္ဆိုရင္ေတာ႕ တင္ထားတဲ႕ window က အနိမ္႕ဆံုးေတာ႕ Window XP SP3 ေလာက္ေတာ႕ရွိ


ထားသင္႕ပါတယ္ဗ်ာ။ Window 7 , Vista အားလံုးရပါတယ္။ XP sp2 မရပါဘူး။ အသံုးျပဳပံုကိုေတာ႕


ေအာက္မွာ ပံုနဲ႕တကြေသခ်ာစြာရွင္ျပေပးထားပါတယ္ဗ်ာ။ 


Code:


ျပီး၇င္ Install ကို ကလစ္ေပးပါ----


ေအာက္က ပံုေလး အတုိင္း install လုပ္ပါလိမ့္မယ္-----


Install လုပ္ျပီးသြားတဲ့ အခါမွာေတာ့ ေအာက္က ပံုေလး ေပၚလာမွာျဖစ္ပါတယ္---- (app search) ကို ကလစ္ေပးလုိက္ပါ------


search box ေလးထဲမွာ viber လို ့၇ို္က္ထည့္ပါ---ျပီး၇င္ enter ေခါက္လိုက္ပါ---


ေအာက္က လုိမ်ိဳး viber free call ေလးကို ကလစ္ေပးလုိက္ပါ---


ျပီး၇င္ေတာ့ ေအာက္က ပံုေလး အတုိင္းသူဘာသာ install လုပ္ပါတယ္---- ျပီးတဲ့ အခါ back arrow key ပံုေလးကို နွိပ္လိုက္ပါ-----


ေအာက္က လိုမ်ိဳး home မွာ viber ေလး ေပၚလာမွာျဖစ္ပါတယ္--- ျပီး၇င္ေတာ့ အဲေကာင္ေလးကို ဖြင့္လုိက္ပါ-----


အေပၚက အဆင့္ေတြ အကုန္ျပီးသြားျပီဆုိ၇င္ေတာ့
Viber လုပ္ပံုလုပ္နည္းေလး အတုိင္းဆက္ျပီးလုပ္၇မွာ ျဖစ္ပါတယ္----
ဖုန္းနံပါတစ္ခုျဖည့္၇ပါတယ္--- ျပီး၇င္ မိမိတို ့၇ဲ ့ viber code ကို
အဲဖုန္းကို မတ္ေစ့ပိုပါလိမ့္မယ့္----- ဖုန္းဆိုတဲ့ ေန၇ာမွာ မိမိတို
့ျဖည့္တဲ့ ဖုန္းဟာ နက္ခ်ိတ္ဆက္ထားဖိုလဲ မလိုပါဘူး--- viber
အေကာင့္မေဖာက္၇ေသးတဲ့ ဖုန္းျဖစ္ဖုိ ့လိုပါတယ္ --ဘာလုိလဲဆိုေတာ့ တျခားသူက
မိမိကုိ viber ေခာ္မယ္ဆို၇င္ မိမိျဖည့္ခဲ့တဲ့ ဖုန္းနံပါတ္ကုိ
ေခာ္ဆို၇မွာျဖစ္ပါတယ္---- အဲ့ခ်ိန္မွာ မိမိတို ့၇ဲ့ ဖုန္းကို viber call က
မ၀င္ပါဘူး -- အဲဖုန္းနံပါတ္နဲ ့သံုးထားတဲ့ မိမိတို ့ကြန္ပ်ဴတာက viber
ကုိ ၀င္မွာျဖစ္ပါတယ္----


အားလံုးျပီး ျပီ ဆို၇င္ေတာ့ အေပၚက ပံုေလး အတုိင္း viber free call ေခၚဆိုလို ့ရျပီ ျဖစ္ပါတယ္-----


===============


ဒုတိယနည္း


===============


ဒါေလက PC မွာ Viber Software ကို အသံုးျပဳခ်င္ တဲ ့သူ ့မ်ား အတြက္ ပါ  ....အလြယ္ဆံုးနည္းလမ္း

လုိ ယူဆ ရတဲ ့ ဟာ ကို ရွာျပီး ေတာ ့တင့္ေပးလိုက္ ရတာပဲဗ်ာ...... အဆင္ေျပမယ္လို ့ ေမွ်ာ္လင့္ ပါတယ္။

အခု တင္ ့ေပးမည္ နည္းအျပင္ တစ္ျခား နည္းလမ္း တစ္ခု လဲ ရွိ ေသတယ္ဗ် ဒါေပမဲ ့ကြ်န္ေတာ္ စိတ္ထဲ
ရႈပ္ေန မလား ဆို ပီး တင္ ့မေပးလိုက္တာ ......

အခု ေပးလိုက္တဲ ့  ေဆာ္၀ဲလ္ ေလးကို ကြန္ပ်ဴတာ မွာ  Install လုပ္  ျပီးရင္  အဲဒီ က  Search မွာ  Viber

ဆိုပီး ရွာ ျပီးရင္  အေကာင့္  Register လုပ္  အတည့္ ျပဳ မည့္ ဖုန္း နံပတ္ ကိုေပး  အဲဒါဆိုရင္  Code

လာေတာင္ လိမ့္မယ္ .. အဲဒါ ကို Free Call ကေန ယူ ျပီးရင္  ကုတ္ ျဖည့္ ျပီး အသံုး ျပဳလို ့ရပါျပီး.....။


=================


တတိယနည္း


=================


ဒီနည္းကေတာ့ က်ေနာ္ ျပည္ပဆိုဒ္ေတြကေန ေတြ႕တာပါ။


ဒီမွာ ၾကည့္လိုက္ပါေနာ္။က်ေနာ္လုပ္ၾကည့္တာလဲလံုး၀အဆင္ေျပပါတယ္။

FlashSongs (SWF) To MP3 Converter Portable ပါ။

Unknown | 26.10.12 | | Best Blogger Tips


 မိမိဖြင့္ထားတဲ့ Flash Songs ကို Firefox ကေန File >> Save as ဆိုၿပီး ကိုယ္သိမ္းလိုတဲ့ေနရာကို ညႊန္းေပးလိုက္ပါ.။ Download ခ်ပါလိမ့္မယ္.ၿပီးတာနဲ႕ ကုိယ္ညႊန္းထားတဲ့ ေနရာကိုသြားၾကည့္ပါ။

သီခ်င္းနာမည္.swf ( Songsname.swf) ဆိုၿပီးေတြ႕ရပါ့မယ္.ေအာက္က နည္းေတြအတိုင္းလုပ္သြားရံုပါ။


Flashsongs (SWF)
ကေန mp3 ေျပာင္းတဲ႕ေဆာ႕ဝဲေလးပါ။  သံုးရတာလည္း လြယ္ပါတယ္ ။
 Software ဖိုင္ကို ဖြင္႕ျပီးေတာ႕ SWF2MP.exe ကိုကလစ္လုိက္ပါ။ ဒါဆိုရင္ေတာ႕
အေပၚမွာျပထားတဲ႕

ပံုေလးေပၚလာပါလိမ္႕မယ္ ။ Add SWF
ကုိႏွိပ္ျပီးေတာ႕ ကိုယ္ေျပာင္းခ်င္တဲ႕ flashsongကို

ေရြးျပီးOpen
ကိုကလစ္ပါ။ျပီးရင္ Convert to MP3 ကိုႏွိပ္လုိက္ပါ။

ဒါဆိုရင္ေတာ့
mp3 ေျပာင္းပါျပီခင္ဗ်ာ။ ေအာက္မွာ ၾကိဳက္ရာ Link က Download လုပ္ႏိုင္ပါၿပီ။


Download Link ====> Mediafire4sharedZippyShareIfile.it 

(4 Shared Accounts မရွိသူမ်ားအတြက္ ခဏတာသံုးႏိုင္ရန္ Username: mailserver.npt@gmail.com Passwords: 12213456 (Passwords ႏွင့္ Username လံုး၀ေျပာင္းမပစ္ပါႏွင့္ အသံုးလိုသူမ်ားအတြက္အဆင္ေျပေအာင္လို႕ပါ။ ကိုယ္ခ်င္းစာစိတ္ထားေပးပါ။ ေက်းဇူးတင္ပါသည္ခင္ဗ်ာ) 

Android ဖုန္းေပၚမွာ ခ်စ္စဖြယ္ WallPaper လွလွေလးတင္ခ်င္တယ္ဆိုတဲ့သူေတြအတြက္ Mini Chameleon For Android

Unknown | 26.10.12 | Best Blogger Tips


Android ဖုန္းေပၚမွာ ခ်စ္စဖြယ္ WallPaper
လွလွေလးတင္ခ်င္တယ္ဆိုတဲ့သူေတြအတြက္ Mini Chameleon For Android ဆိုတဲ့
Android Application ေလးတင္ေပးလိုက္ပါ။ အျမဲတေစအိပ္ေနတတ္တဲ့
ခ်စ္စရာပိုးတံုးလံုးေလး..သူအိပ္ေနတာကို သြားထိမိရင္ထေအာ္တတ္တယ္..ဖုန္းကို
လႈပ္မိရင္ မူးေ၀သြားၿပီး
အေရာင္အမ်ိဳးမ်ိဳးေျပာင္းတတ္ပါေသးတယ္..စိတ္၀င္စားတယ္ဆိုရင္ေတာ့ ေအာက္က
ၾကိဳက္ရာ Link မွာ Download ယူႏိုင္ပါၿပီခင္ဗ်ာ။


Download Link ===> MediafireZippyshare4sharedifile.it


(4shared Account မရွိသူမ်ား ခဏတာ သံုးႏိုင္ရန္အတြက္ Username နဲ႕ Passwords တင္ေပးလိုက္ပါတယ္။

Passwords ကိုခ်ိန္းမသြားပါနဲ႕ခင္ဗ်ာ..ေနာက္လူေတြ အဆင္ေျပေျပနဲ႕ယူသံုးႏိုင္ေအာင္လို႕တင္ေပးထားတာပါ။ Username: mailserver.npt@gmail.com ၊ Pass: 12213456 )


Android ဖုန္းေပၚမွာ လက္နဲ႕ေရာင္စံုအရုပ္ေလးေတြ ေရးႏိုင္မယ့္ Art Of Glow For Android

Unknown | 26.10.12 | Best Blogger Tips


(4shared Account မရွိသူမ်ား ခဏတာ
သံုးႏိုင္ရန္အတြက္ Username နဲ႕ Passwords တင္ေပးလိုက္ပါတယ္။

Passwords
ကိုခ်ိန္းမသြားပါနဲ႕ခင္ဗ်ာ..ေနာက္လူေတြ
အဆင္ေျပေျပနဲ႕ယူသံုးႏိုင္ေအာင္လို႕တင္ေပးထားတာပါ။ Username:
mailserver.npt@gmail.com ၊ Pass: 12213456 )


Android ဖုန္းေပၚမွာ လက္နဲ႕ေရာင္စံုအရုပ္ေလးေတြ ေရးႏိုင္မယ့္ Art Of Glow For Android Version ေလးတင္ေပးလိုက္ပါတယ္။ စိတ္၀င္စားဖို႕လဲေကာင္းပါတယ္..ကိုယ္လိုခ်င္တဲ့ပံုေလးေတြကို ပံုအမ်ိဳးမ်ိဳး လက္နဲ႕ေရးဆြဲႏိုင္ပါတယ္..စိတ္၀င္စားတယ္ဆိုရင္ေတာ့ ေအာက္မွာ ၾကိဳက္ရာ Link က Down ႏိုင္ပါတယ္ခင္ဗ်ာ။ အဆင္မေျပတာရွိရင္ ကြန္မန္႕ေရးေပးခဲ့ပါ။


Download Link ===> Mediafire ZippyShare4SharedIfile.it

Thursday, 25 October 2012

Epson Stylus Office T30 Printer Driver ပါ။

Unknown | 25.10.12 | | Best Blogger Tips


Command Box မွာ Epson Stylus Office T30 Printer Driver လိုခ်င္တယ္လို႕ေတာင္းဆိုထားတဲ့ အစ္ကိုအတြက္ Download လုပ္လို႕ရမယ့္ Site ေတြကို တင္ေပးလိုက္ပါတယ္။ အဆင္မေျပဘူးဆိုရင္ ကြန္မန္႕ေရးသားထားခဲ့ပါခင္ဗ်ာ။


Download Epson Stylus Office T30 Printer Driver


Download Link 1


Download Link 2


====================================

 www.winkabarkyaw.blogspot.com                                   II

====================================

ႏိုက္ကလပ္ သြားစရာမလိုေတာ့ပါဘူး Virtua Girl လာပါၿပီတဲ့..။

Unknown | 25.10.12 | Best Blogger Tips


အင္တာနက္ခ်ိတ္ထားတဲ့ သူေတြအတြက္ Virtua Girl နဲ႕မိတ္ဆက္ေပးမွာပါ.. ဒီ Software ဟာဆိုရင္ မိမိမွာ ကိုယ္ပိုင္အင္တာနက္ရွိတဲ့သူေတြအတြက္ အဆင္ေျပမွာပါ..ဘယ္လိုေကာင္းသလဲ သိခ်င္ရင္ေတာ့

Download ခ်ၿပီး သံုးၾကည့္ၾကပါခင္မ်ာ..သိၿပီးသားသူမ်ားကလဲ လက္တို႕ေပးၾကေပါ့.. :P ေအာက္မွာ Down ႏုိင္ပါၿပီ..။ အဆင္ေျပရင္ ကြန္မန္႕ေလးေတြ ျမင္ခ်င္ပါတယ္ေနာ္..။


Download Virtua Girl Here!!


IP တည္ေနရာအား စုံစမ္းေပးမယ့္ Software ( For Tracker) Download Link ျပန္ျပင္ေပးထားပါတယ္။

Unknown | 25.10.12 | | | Best Blogger Tips


ဒါေလးကေတာ့ tracker (စုံေထာက္လုိသူ) ေတြ အၾကုိက္ေတြ ့ေစမယ့္

Software ေလးတစ္မ်ုိးပါဘဲ။ တည္ေနရာ အတိအက်လုိက္နုိင္တဲ့ အတြက္ေၾကာင့္မုိ ့
သုံးေနတဲ့ေနရာကိုပါသိနုိင္ပါတယ္။ အားသာခ်က္ေလးကေတာ့ Map နဲ ့ satellite ရယ္
hybird ဆုိျပီး ပါ၀င္ပါတယ္။ Map ကိုသုံးမယ္ဆုိရင္ေတာ့

GPS လုိပါဘဲ။ ပုံေလးမွျပထားသလုိ ေပၚမွာျဖစ္ပါတယ္။ satellite ဆုိရင္ေတာ့
Google earth လုိမ်ဳိးဘဲ အိမ္ပုံေတြ လမ္းပုံေတြကအစ အကုန္
ျပသေပးမွာျဖစ္ပါတယ္။

အားနည္းခ်က္လည္းရွိပါတယ္။

စိတ္ပ်က္ဖုိ ့ေတာ့ အေတာ္ေလးေကာင္းတဲ့အခ်က္ပါဘဲ။
ျမန္မာနုိင္ငံ မွာ ဘာမွသုံးစားမရနုိင္ပါဘူး။ ျမန္မာ နုိင္ငံ တြင္းက
ကြ်န္ေတာ့ သူငယ္ခ်င္းအုိင္ပီေတြလုိက္ဖမ္းၾကည့္တယ္ဗ်။

အကုန္လုံးက ရန္ကုန္ ကပါဘဲ ။ ဒါေပမယ့္ တည္ေနရာေတြက ၇ွမ္းျပည္ျပတဲ့ေကာင္နဲ ့
စစ္ကုိင္းျပတဲ့ေကာင္နဲ့ေနာက္တစ္ေယာက္ဆုိ ကရင္ျပည္နယ္ဘက္ေတာင္
ျပေနလုိက္ေသးတယ္။

မေက်ဘူးဆုိျပီး မေလးက အစ္ကို အုိင္ပီကို လွမ္းဖမ္းၾကည့္ပါတယ္။ ကြတ္တိဘဲ ဗ်ာ
သူသုံးေနတဲ့ေနရာ လမ္းနမည္အကုန္ေပၚလာပါတယ္။ ေမးလိုက္ေတာ့လည္း မျငင္း၀ူး။
မင္းဘယ္လုိသိတာလဲတဲ့။

 
ျပည္မွာေတာ့သိပ္အသုံး၀င္ဘူးေပ့ါဗ်ာ။ လုိခ်င္ေတာ့ေဒါင္းထားပါ။


Download 1Download 2 (Another Link For Download 2 )

Download Link ေတြျပန္ျပင္ေပးထားပါတယ္ခင္ဗ်ာ။ (၂၆.၁၀.၂၀၁၂)


Download 1,2 ႏွစ္ခုေပးထားပါတယ္။ ႏွစ္ခုလုံးေဒါင္းလုိက္ပါ။

ပထမ တစ္ခုကိုေဒါင္းလုိက္ရင္ GeoLiteCity.dat.gz ဆုိျပီးပါလာပါမယ္။ rar
ဖုိင္ပုံစံမ်ဳိးပါဘဲ။ သူ ့ကို extrat လုပ္လုိက္ပါ။ ျပီးရင္ Download 2
ကိုေဒါင္းျပီးတဲ့အခ်ိန္မွာ Install လုပ္ပါ။ ျပီးရင္

Geolitecity.dat ဖုိင္ကို ေအာက္က ပတ္လမ္းအတုိင္းသြားေရာက္ထည့္ပါ။

C:\Program Files\IP Locator

အားလုံးျပီးျပီျဖစ္ပါတယ္။ စတင္အသုံးျပဳ ့နုိင္ပါျပီ။ ဒီေတာ့ ေဆာ့၀ဲလ္ကို
run လုိက္ပါျပီးရင္ ဘယ္ဘက္ ေထာင့္အေပၚနားမွာ မ်က္ဘီလူးပုံေလးပါပါတယ္။
နုိပ္လုိက္ပါ ေဘာက္ေလးတစ္ခုက်လာပါလိမ့္မယ္။ အဲ့ေဘာက္တည္းမွာ
အိုင္ပီထည့္လုိက္ပါ။ ျပီးရင္ေတာ့ တတ္လာပါလိမ့္မယ္ေနရာအတိအက်ေလးေတြေပါ့ ။။
သတိ ျမန္မာ နုိင္ငံ GPS သည္ IP hide စရာမလုိ အဆင့္ျမင့္ျမင့္ျပဳလုပ္ထားေသာေၾကာင့္ ျမန္မာ အုိင္ပီမ်ားအား ဖမ္းမရနုိင္ပါ။ :P

Computer Network Hacking With BackTrack 5 (Ebooks ျမန္မာလို)

Unknown | 25.10.12 | | | Best Blogger Tips


Computer Network Hack ခ်င္ပါတယ္ဆိုတဲ့သူေတြအတြက္ က်ေနာ့္ရဲ႕ ေဘာ္ဒါတစ္ေယာက္ေရးထားတဲ့

Networok Hacking စာအုပ္ေလးကို မသိေသး.မရွိေသးသူမ်ားအတြက္ ေ၀မွ်လိုက္ပါတယ္။ နည္းပညာဆိုတာ Open Source ပါ။ ဒါေၾကာင့္ ေကာင္းတဲ့ဘက္က လုပ္ရင္ေကာင္းသလိုျဖစ္မယ္.မေကာင္းတဲ့ဘက္က လုပ္ရင္မေကာင္းတာဘဲျဖစ္မွာပါ..ဘာဘဲျဖစ္ျဖစ္ က်ေနာ့္အေနနဲ႕ က်ေနာ္သိသမွ်ကိုေတာ့ ထိန္ခ်န္ထားမွာမဟုတ္ဘူး..ဒီလိုမကြယ္မ၀ွက္မွလဲ က်ေနာ္တို႕လူမ်ိဳးေတြ တိုးတက္မွာေလ..နည္းပညာဆိုတာ အေကာင္းနဲ႕အဆုိးဒြန္တြဲေနတာပါဘဲ.ဒါေလးကိုနားလည္ရင္ရပါၿပီ.. အခု ဒီ Network Hacking နည္းကလဲ

BackTrack 5 ဆိုတဲ့ Linux Os နဲ႕တြဲၿပီးလုပ္ရမွာပါ..စာအုပ္ထဲမွာေရးထားတဲ့အေၾကာင္းအရာေတြက လြယ္ကူတယ္..လူတိုင္းနားလည္တယ္.လူပိန္းကအစလုပ္တတ္မယ္.ဒါေပမယ့္..ျမွပ္ကြက္ေလး တစ္ကြက္ ႏွစ္ကြက္ေတာ့ ထည့္ထားပါတယ္..ဒါလဲဘဲမခက္ပါဘူး ဥာဏ္ရွိသလိုေပါ့.. :P . ဒီစာအုပ္ပါအေၾကာင္းအရာေတြက ရံုးဌာနေတြမွာ Network ခ်ိတ္ဆက္ထားတဲ့ကြန္ပ်ဴတာေတြရဲ႕ အခ်က္အလက္ေတြကို ေဖာက္မလား..ယူမလား..ကြန္ပ်ဴတာေတြ .. Printer ေတြကို အေ၀းကေနထိန္းခ်ဳပ္မလား..အင္တာနက္ဆိုင္ေတြမွာ ပတ္ေမႊမလား.အကုန္အကုန္ ကို္ယ္စိတ္၀င္စားသလို.ဥာဏ္ရွိသလို လုပ္လို႕ရပါတယ္.. ဒါေပမယ့္ BackTrack5 ကေတာ့ရွိမွရမွာေနာ့္.. :P

ေအာက္မွာ ၾကိဳက္တဲ့ Link က Down ႏိုင္ပါၿပီ..။


Download Link ===>> Ziddu ၊ ၊ 2shared4sharedfilecloud.io ၊


Windows 7 တြင္ Tavultesoft Keyman (Myanmar 1,2,3) ရံုးသံုးျမန္မာစာ စာရိုက္သည့္ Software တင္ထားေသာ္လည္း လက္ကြက္အမွန္ရိုက္မရသူမ်ားအတြက္)

Unknown | 25.10.12 | Best Blogger Tips

Windows 7 တြင္ Tavultesoft Keyman (Myanmar 1,2,3)

 ရံုးသံုးျမန္မာစာ စာရိုက္သည့္ Software တင္ထားေသာ္လည္း လက္ကြက္အမွန္ရိုက္မရသူမ်ားအတြက္..ေျဖရွင္းနည္းကို တင္ျပေပးလိုပါတယ္။ က်ေနာ့္သူငယ္ခ်င္းတစ္ေယာက္က ေတာင္းဆိုထားသည့္အတြက္ သူ႕အတြက္ေရာ .. အစိုးရရံုး၀န္ထမ္းမ်ားအတြက္ပါ အဆင္ေျပေအာင္ ဒီပို႕စ္ေလးကိုတင္ေပးလိုက္ရပါတယ္ခင္မ်ာ။

အစိုးရံုးေတြမွာ စာရိုက္သည့္အခါ ေတာ္ေတာ္မ်ားမ်ားက Myanmar 2 ႏွင့္ Myanmar 3 လက္ကြက္ေတြနဲ႕

စာရိုက္ၾကရပါတယ္..အဲဒီအတြက္ Tavultesoft Keyman ဆိုတဲ့ Software ကိုေတာ္ေတာ္မ်ားမ်ားက အသံုးျပဳၾကပါတယ္...ဒီ Software ကိုသံုးတဲ့အခါမွာ Windows XP မွာဆိုလွ်င္ ဘာမွျပသနာမရွိေသာ္လည္း Windows 7 မွာဆိုရင္ ျပသနာအနည္းငယ္ရွိပါတယ္.ဘယ္လိုျပသနာလဲဆို

ရင္ Tavultesoft Keyman ကို Install လုပ္..သက္ဆိုင္ရာ Fonts ေတြကို Fonts folder ထဲကိုထည့္ၿပီး

ေသာ္လည္း Microsoft Office တြင္ စာရိုက္သည့္အခါ လက္ကြက္တလြဲေတြ ေပၚေနတဲ့ျပသနာပါ..ဒါကို အခုက်ေနာ္ေျဖရွင္းျပပါ့မယ္....


ပံုုမွာ ျပထားတဲ့ အတိုင္း Tavultesoft Keyman ရဲ႕ Icon ေလးဟာ Notification Bar ထဲကို ၀င္ေနပါတယ္..ဒါဟာ လက္ကြက္မမွန္ျဖစ္ရတဲ့ အဓိက အေၾကာင္းအရင္းပါ..ဒါကိုဘယ္လိုေျဖရွင္းမလဲဆိုေတာ့..ေအာက္ကပံုကိုဆက္ၾကည့္ပါ။


ပထမဆံုးအေနနဲ႕ ေအာက္ဆံုးက Start Menu Bar ရဲ႕ လြတ္ေနတဲ့တစ္ေနရာကို Right click ေထာက္ပါ။

ေအာက္ဆံုးက Properties ကိုေရြးခ်ယ္ေပးပါ။ Taskbar and Start Menu Properties Box တက္လာပါလိမ့္မယ္။ ပံု (၁) မွာျပထားတဲ့အတိုင္း Customize ကိုႏွိပ္ပါ။ ပံု (၂) မွာျပထားတဲ့အတိုင္း 

Tavultesoft Keyman ရဲ႕ Icon ေလးကိုရွာလိုက္ပါ.. သူ႕ရဲ႕ညာဘက္ေဘးနားမွာ Only show notifications (သို႕) Hide Icons and Notifications ဆိုၿပီးျဖစ္ေနပါလိမ့္မယ္.. အဲဒါကို Show Icons and Notifications ဆိုၿပီးျပင္ေပးလိုက္ပါ။ ၿပီးတာနဲ႕ ပံု (၃) မွာျပထားတဲ့အတိုင္း OK ႏွိပ္ၿပီးထြက္လိုက္ပါက Windows 7 မွာ Tavultesoft Keyman ရံုးသံုးျမန္မာစာ စာရိုက္စနစ္ကို လက္ကြက္ မွန္မွန္နဲ႕အသံုးျပဳလို႕ရသြားပါၿပီခင္မ်ာ..။ (IT Helper - mailserver.npt@gmail.com)

Recycler (or) Copy of shortcut to Virus ရွင္းေပးမယ့္ Simple Cmd Program (လူတိုင္းဖတ္ပါ၊လူတိုင္းေဆာင္ထားပါ)

Unknown | 25.10.12 | | Best Blogger Tips


ယခင္တုန္းကေတာ့ ကြန္ပ်ဴတာ Virus ဆိုတာ ကြန္ပ်ဴတာထဲကို ၀င္ေရာက္လာၿပီဆိုတာနဲ႕ ကြန္ပ်ဴတာကိုေႏွးေအာင္လုပ္မယ္..ပီးရင္TaskManager , Run Box, Folder Options အစရွိတာေတြကိုသံုးမရ ေအာင္ပိတ္ပစ္မယ္.ပီးရင္ Windows OS တစ္ခုလံုးကို ဖ်က္ခ်ပစ္မယ္.ဒီလိုမ်ိဳးေတြခ်ည္းပါဘဲ..၂၀၁၀ ေလာက္ကေနစၿပီး ယခုအခ်ိန္ထိမွာ ထြက္ေပၚလာတဲ့


Virus ေတြကေတာ့ အေပၚကေျပာခဲ့သလို မ်ိဳးေတြမဟုတ္ေတာ့ပါဘူး...USB Stick ေတြထဲကေန ပါလာတယ္..ပီးရင္ ကြန္ပ်ဴတာရဲ႕ Registry အပိုင္းမွာ autorun.inf ေဆာက္ၿပီး ကြန္ပ်ဴတာတစ္ခုလံုးမွာ


ရွိတဲ့ Program ေတြအကုန္လံုးဆီကို သူ႕ရဲ႕ အဖ်က္အေမွာင့္ Code ေတြကို ထည့္ေပးလိုက္တယ္....အဲဒီလို


ျဖစ္ေနတဲ့ ကြန္ပ်ဴတာဆီကို လာထိုးတဲ့ Stick တိုင္းကို အေပၚပံုမယ္ျပထားသလို Copy of shortcut to (1 to 4) နဲ႕ RECYCLER ဆိုတဲ့ သူ႕ရဲ႕ Virus ကိုယ္ပြားဖိုင္ေတြ ကူးစက္သြားေစတယ္..အဲလို ကူးစက္ခံရတဲ့ USB Stick က အျခားကြန္ပ်ဴတာမယ္ ထိုးလိုက္မယ္ဆိုရင္ ဒီ Virus ေတြကေတာ့ ျပန္႕သြားမွာပါဘဲ..Antivirus နဲ႕စစ္လုိက္ရင္လည္း Virus ရာေက်ာ္.ေထာင္ေက်ာ္ မိပါတယ္ဆိုၿပီးျပတယ္..အမွန္ေတာ့ ကြန္ပ်ဴတာတစ္ခုလံုးမွာရွိတဲ့ Program မွန္သမွ်ကို Virus Code ထိထားတဲ့အတြက္ Antivirus က Program မွန္သမွ်ကို Virus လို႕သတ္မွတ္ၿပီး သတ္ေနေတာ့တာပါဘဲ..သတ္လို႕ကုန္သြားၿပီဆိုရင္ေတာ့ ကိုယ့္ကြန္ပ်ဴတာထဲမယ္ရွိတဲ့ Program ေတြလဲ တစ္ခုမွသံုး၇ေတာ့မွာမဟုတ္ပါဘူး...တစ္ခါတစ္ေလ Update မလုပ္ထားတဲ့ Antivirus ေတြကိုေတာင္မွ သံုးမရေတာ့ေလာက္ေအာင္ လုပ္ပစ္ပါေသးတယ္။ လူတိုင္းကေတာ့ Windows ျပန္အသစ္တင္လိုက္ရင္ေကာင္းသြားပါတယ္လို႕ေျပာၾကလိမ့္မယ္..ဒါေပမယ့္ လံုး၀မွားယြင္းပါတယ္..ဘာလို႕လဲဆိုေတာ့ သင့္ကြန္ပ်ဴတာမွာ C , D , E ဆိုၿပီး ရွိတယ္ဆိုရင္.. Windows ျပန္တင္တာ C မွာဆိုပါစို႕.... ဒီ Copy of shortcut or Recycler Virus က ကြန္ပ်ဴတာတစ္ခုလံုးကိုကူးစက္တာျဖစ္တဲ့အတြက္ က်န္တဲ့ D နဲ႕ E အပိုင္းကို ေသခ်ာေပါက္၀င္ေနမွာပါ..Windows တင္ၿပီးကာစမွာ က်န္တဲ့ D နဲ႕ E ထဲက Program တစ္ခုကို သြား Run ၾကည့္ပါလား... Happy Birthday လို႕ေအာ္ၿပီး Virus ေတြ ထ 'က' ေနၾကဦးမွာ အမွန္ပါဘဲ..:P ဒီေတာ့ လိုရင္းဘဲေျပာပါေတာ့မယ္ တကယ္လို႕မ်ား သင့္ရဲ႕ Memory Stick ထဲမွာ အထက္ေဖာ္ျပပါ ပံုထဲမွာလို Copy of shortcut to 1 to 4 and RECYCLER လိုဖိုင္ေတြမ်ားေတြ႕ခဲ့ၿပီဆိုရင္ အခုက်ေနာ္ တင္ေပးထားတဲ့ Simple Cmd Program ကို Run လိုက္ပါ..ပီးရင္ စက္က အလိုလို Restart က်သြားပါလိမ့္မယ္..စက္ျပန္တက္လာတာနဲ႕ Stick ထဲမယ္ရွိတဲ့ RECYCLER ဆိုတဲ့ Folder ကိုဖ်က္ပစ္လိုက္ပါ..ပီးရင္ စိတ္ခ်ရတဲ့ Antivirus တစ္ခုခုနဲ႕ ကြန္ပ်ဴတာတစ္ခုလံုးကိုေရာ မိမိ Stick ကိုပါစစ္ေဆးပါ။ ဒီလိုဆိုရင္ Program ေတြကို ျပန္တင္ရတဲ့ ဒုကၡ ကင္းသြားပါလိမ့္မယ္ခင္ဗ်ာ..အားလံုးဘဲအဆင္ေျပရင္ ကြန္မန္႕ေလးေတြျမင္ခ်င္ပါတယ္ေနာ္...........။


Download Link ====> Ziddu . Mediafire . 2Shared . 4Shared. Zippyshare

Wednesday, 24 October 2012

Windows 7 မွာThis copy of windows is not genuine လို႕ေပၚၿပီး Desktop Screen မဲေနသူမ်ားအတြက္

Unknown | 24.10.12 | Best Blogger Tips


Windows 7 မွာThis copy of windows is not genuine လို႕ေပၚၿပီး Desktop Screen မဲေနသူမ်ားအတြက္ ဒီ ပိုစ့္ေလးကို ဗဟုသုအေနနဲ႕တင္ေပးလိုက္ရပါတယ္။ Desktop wallpaper ကို ခ်ိန္းလိုက္ေသာ္လည္း စကၠန္႕သံုးဆယ္ ဒါမွမဟုတ္ တစ္မိနစ္အတြင္း အမဲေရာင္ျပန္ျဖစ္သြားတာပါ။ ဒါဟာ ဘာေၾကာင့္လဲ ? ဟုတ္ကဲ့ ကိုယ္တင္တဲ့ Windows 7 က License မမွန္လို႕ျဖစ္တာပါ...။ ေနာက္ၿပီး အဓိက


Screen မဲရတဲ့ အဓိကအေၾကာင္းရင္းက အင္တာနက္ခ်ိတ္ဆက္ထားတဲ့ Windows 7 သံုးကြန္ပ်ဴတာေတြမွာ Windows Update လုပ္ငန္းစဥ္ကို ပိတ္မထားလို႕ျဖစ္ပါတယ္။ ကိုယ္သံုးေနတဲ့ Windows 7 က Copy ... အဲဒါကို အင္တာနက္ခ်ိတ္ၿပီး Windows Update လုပ္လိုက္ေတာ့ Microsoft Server က ေကာ္ပီးမွန္လဲသိေရာ ကန္ခ်လိုက္တာေပါ့ဗ်ာ..License ကို Block လုပ္ပစ္လိုက္တာေပါ့။


Windows 7 Loader ေတြနဲ႕ License Crack သံုးမယ္ဆိုရင္ေတာင္ ကန္ခ်ခံရဖို႕ကေတာ့ ရာႏႈန္းမ်ားေနပါေသးတယ္..ဒါေၾကာင့္ မိမိ Windows7 က တန္ရာတန္ေၾကးနဲ႕ေပး၀ယ္ထားတာမဟုတ္ရင္ေတာ့ လံုး၀ Update မလုပ္လိုက္ပါေလနဲ႕.မဲလတူးျဖစ္သြားပါလိမ့္မယ္ခင္ဗ်ာ..။


  ေနာက္တစ္ခ်က္က ျမန္မာႏိုင္ငံမွာရွိတဲ့ Computer Services Center ေတာ္ေတာ္မ်ားမ်ားက သူတို႕ဆီမယ္ Windows 7 တင္ၿပီဆိုရင္ တင္ေပးလိုက္တာဘဲရွိပါတယ္..ကိုယ္ တင္ေပးလိုက္တဲ့ Windows 7 က လိုင္စင္ပါမပါလဲမၾကည့္ဘူး..ဒီေတာ့ သံုးတဲ့သူက နားမလည္ရင္ ဒုကၡေရာက္ေတာ့တာေပါ့ဗ်ာ..ျမန္မာႏိုင္ငံမွာ ရွိတဲ့ Windows 7 ေတာ္ေတာ္မ်ားမ်ားက Copy နဲ႕Trial Version (30 Days) ေတြက မ်ားပါတယ္..ဒါေၾကာင့္ Windows 7 တင္ၿပီးၿပီဆိုရင္ Windows 7 Loader ေတြနဲ႕ လိုင္စင္ ျဖည့္ကိုျဖည့္ေပးရပါမယ္။ 


အခု Windows Update လုပ္မိလို႕ မဲသြားတဲ့ကြန္ပ်ဴတာ အတြက္ ျပဳျပင္နည္းကို ေျပာျပပါ့မယ္။

(၁) Run Box ကိုေခၚပါမယ္.. ကီးဘုတ္မွာ ရွိတဲ့ Windows Key နဲ႕ R ကိုတြဲႏွိပ္လိုက္ပါ။ Run Box တက္လာပါလိမ့္မယ္။ အဲဒီထဲမယ္ msconfig  ဟုရိုက္ထည့္ၿပီး OK ႏွိပ္ပါ။ System Configuration Box

တက္လာပါလိမ့္မယ္.အဲအထဲမွာမွ  Services ကိုေရြးခ်ယ္လိုက္ပါ။ ပီးတာနဲ႕ ေအာက္ဆံုးအထိ Scroll Bar ေလးကိုဆြဲသြားၿပီး Windows Update နဲ႕ Security Center ကိုအမွန္ျခစ္ျဖဳတ္ေပးလိုက္ပါ။ ပီးရင္ Apply >> OK အဆင့္ဆင့္ထြက္လိုက္ပါ။ Restart ခ်ခိုင္းပါလိမ့္မယ္ မခ်ပါနဲ႕ Exit Without Restart လို႕ေပးလိုက္ပါ။

(၂) WAT Fix.exe ကို Run (Double Click) ႏွိပ္လိုက္ပါ။ WAT Fix Box တက္လာၿပီး သူ႕ဘာသာသူ 1% ကေန 100% အထိ အလုပ္လုပ္ေနပါလိမ့္မယ္.ပီးရင္ သူ႕ဘာသာသူ Computer Restart က်သြားပါလိမ့္မယ္။

(၃) စက္ျပန္တက္လာရင္ WiLoader.exe ကို Double Click ႏွိပ္ပါ။ Install နဲ႕ Uninstall ဆိုၿပီးႏွစ္ခုေပၚလာရင္ Uninstall ကိုအရင္ႏွိပ္ပါ။ Restart ခ်ခိုင္းရင္ ခ်ေပးလိုက္ပါ။ စက္ျပန္တက္လာရင္ WiLoader.exe ကို ထပ္ၿပီး Run လိုက္ပါဦး..Install နဲ႕ Uninstall ေပၚလာရင္ Install လုပ္ပါ..အစိမ္းတန္းေလးတက္တာၿပီးသြားရင္ Restart ခ်ခိုင္းပါလိမ့္မယ္..ခ်ေပးလိုက္ပါ။။ စက္ျပန္တက္လာၿပီဆိုရင္ေတာ့ This Copy of windows is not genuine ဆိုတဲ့ စာတန္းလဲေပ်ာက္သြားပါလိမ့္မယ္..ပီးတာနဲ႕ မိမိစိတ္ၾကိဳက္ BackGround ခ်ိန္းၿပီး ပံုမွန္အသံုးျပဳႏိုင္ၿပီျဖစ္ပါတယ္။


Windows 7 တင္ၿပီးကာစ သူမ်ားအတြက္ လိုင္စင္ ထည့္ရန္အတြက္ကေတာ့ အထပ္ေဖာ္ျပပါ အဆင့္ (၃) အတိုင္း ျပဳလုပ္ေပးပါရန္။

မွတ္ခ်က္ -- This copy of windows is not genuine စာတန္းေပၚေနၿပီဆိုရင္ ေပကပ္ၿပီးေတာ့ ဆက္မသံုးပါနဲ႕..လံုး၀ အမည္းေရာင္ျဖစ္ၿပီး ဘားမွမတက္ေတာ့တဲ့ အျဖစ္မ်ိဳး ေလးငါးခါေလာက္ၾကံဳဖူးခဲ့လိုက္ပါခင္မ်ာ။ၾကိဳက္တဲ့ Link ကေန Windows Loader ကို Down ႏိုင္ပါၿပီ။

 Download Links ====> ZidduMediafire2Shared4Shared